Monday, January 26, 2015

Nuts About Sketches {Dance to the Tune of Your Heart}

Time for a new sketch from Nuts About Sketches! Such a fun one too! 
I was out taking some Senior Pictures for a friend and my oldest daughter had come along to help me out. We were taking a pause from all the clicking and posing when I happened to look over to see where my daughter was. She was up on a hill side dancing around. I loved how she looked so graceful and loved the beautiful blue sky that was her background. It was such a perfect moment to capture. 
I used a sheet from Fancy Pants- What a Wonderful Day, cut it down and framed it with some darker gray cardstock. Then for the heart I cut it out from another sheet in that same line and then ran it through my crimper. I love the texture it adds to my layout. I also cut out the word "Dance" on my Silhouette twice, once on gray cardstock and again on a lighter yellow then layered and off set them a bit. Then used some red foil Thickers for my word "heart".
Here's some close ups of some of the embellishments. Love how the washi tape turned out. :)
Thanks for stopping by! :)

Moxxie {Beauty layout}

Good morning! Boy do I have a treat for you! I've been playing with Moxxie's new Springtime line it's absolutely gorgeous!! Have you seen it? Well let me show it to you!
Absolutely gorgeous! I love the colors and the whimsy-ness of it. It worked beautifully for these pictures of my youngest daughter.
I started out by punching two different borders and sponging the edges with some Tim Holtz Vintage Photo Distressing Ink. I then did some folding on the green strip to create a faux ribbon.
I also did some fussy cutting for these tiny little dandelion seeds. I cut them out of another sheet of paper then layered them on this one using some 3D-Dots. I also added some Stickels to give them a bit of "bling". :)
I also added some Stickles to the rest of the white dandelions. It's a little hard to see in this picture but it really adds to it and looks beautiful. 
I absolutely love this new line! Thanks for stopping by! :)


Moxxie Products Used:

SPR-1519 Springbirds
SPR-1520 Dandelion Wishes
SPR-1521 In Bloom
SPR-1522 Take Flight
SPR-1523 Butterfly Garden
SPR-1524 Springtime Cutouts
SPR-2287 Springtime Sticker
AL-2293 Green Alpha

Thursday, January 22, 2015

Home Decorations {Valentine's Day}

  Hello! Do you know what's right around the corner!? Valentine's Day! I just adore that holiday. I love decorating for it! See what I mean! I just needed a new V-day decoration. ;)
I was wandering around Michaels the other day and found a cute wooden heart with another glued on top of it (I wish I would have taken a before picture but totally spaced it!). I also picked up the cutest roll of polka dotted burlap and some letters to spell out the word LOVE. I painted the bigger heart black and created some burlap rosettes that I hot glued down.
I then painted the smaller heart red and used it as my "O" in LOVE.
I then hot glued them down to a long strip of the burlap and stapled down a loop of burlap to the back of the big heart so I could hang it from my door. Absolutely LOVED how it turned out! Here's another look at it. 
Thanks so for stopping by! :)

Monday, January 19, 2015

Nuts About Sketches {Snowflakes are... layout}

Good morning! Hope everyone had a great weekend! Nuts About Sketches has a really fun two page layout sketch. 
I only used the left side for my layout. As I was going through my stuff I came across an older line from Fancy Pants that I absolutely love and thought it was perfect for my pictures! I love when everything comes together perfectly! ;)
I started out by inking up the edges of my paper and my pictures. I adhered my pictures and added some 3D-Dots to the middle picture to add some dimension to the layout. Next I added a cute heart sticker from the sticker sheet and and layered another sticker on top of the heart using some more 3D-dots and some brads on ends.
I then cut along the curves on another sheet and did some inking and distressing on them. Using it for my title.
Now for my favorite part! I added some Crystal Stickles to the snowflakes to make them shine.  Then I did some paper piercing and stitching into circles. Love how cute they turned out. :)
Make sure to check out the other layouts created by the other Nuts About Sketches design team members! Always great inspiration!
Thanks for stopping by! :)

Friday, January 16, 2015

Moxxie {Little Star card}

Hello! Did any of you go to CHA this year!? I would love to attend sometime! Maybe I should add that to my ever growing bucket list! :) Well, if you did get the chance to attend and you stopped by the Moxxie booth you might have seen my cute and fun little card I want to share with you today! Yup, my card made it to CHA! So exciting! 
For 
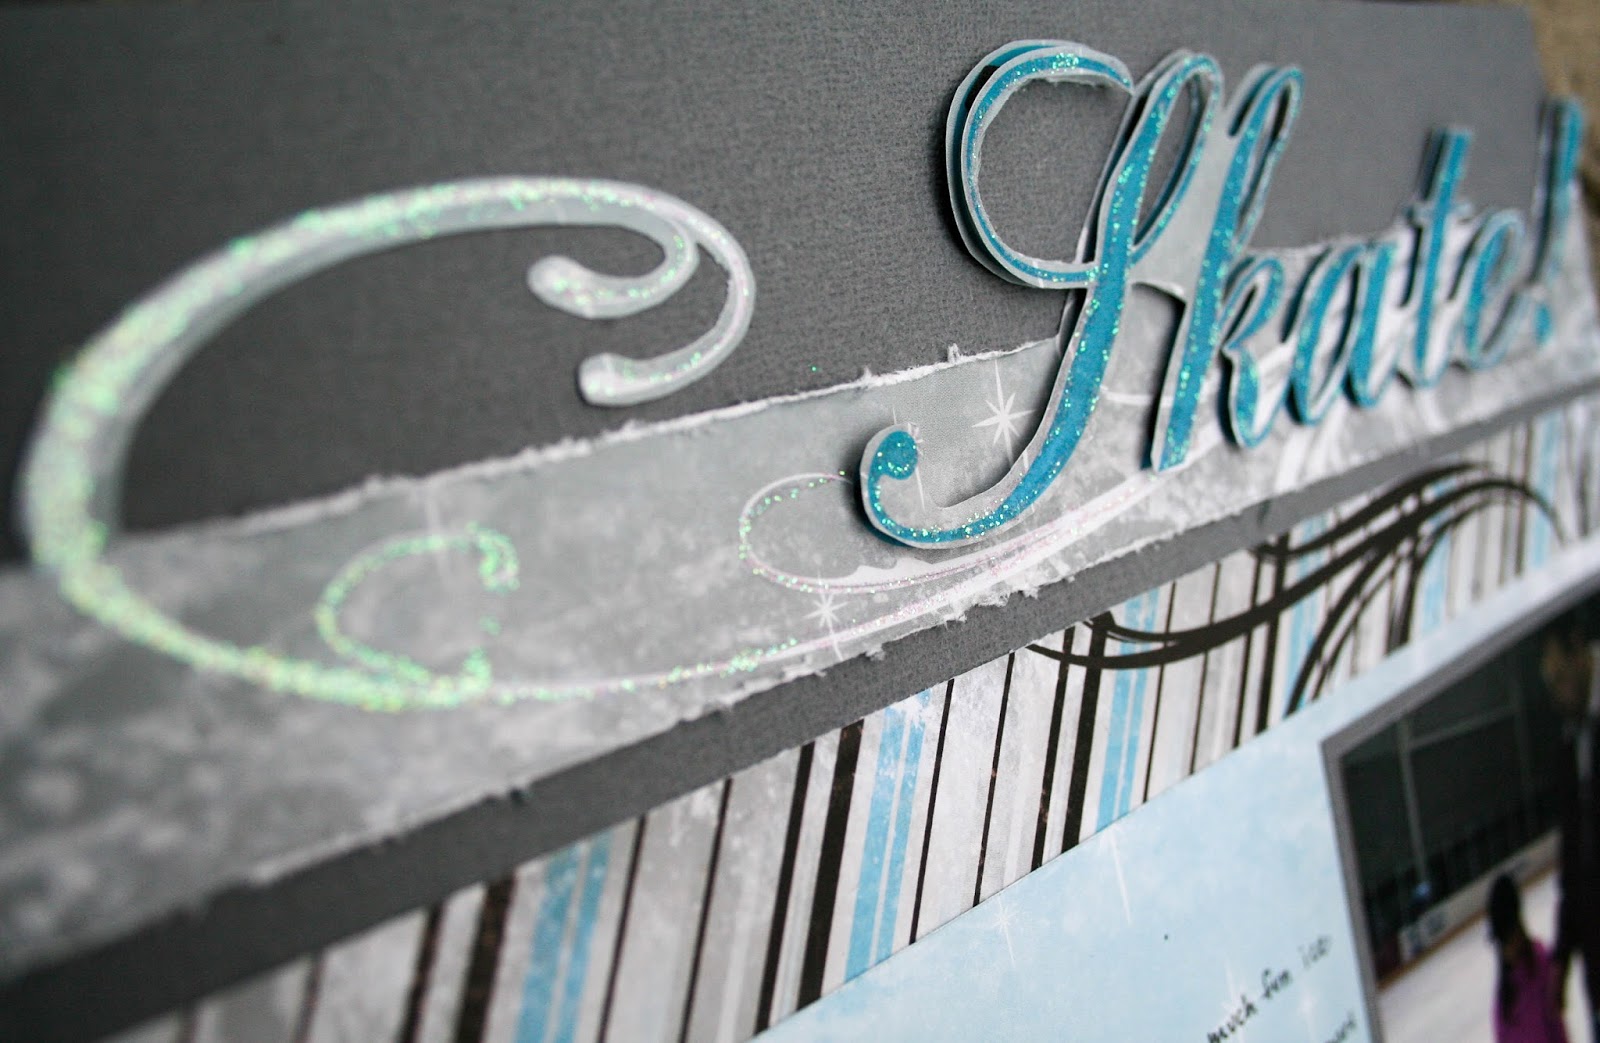
this cute little card I used Moxxie’s new line, Tiny Dancer. I absolutely love the colors! I used a gray piece of cardstock for my base card (4 ¼” x 5 ½” after folding). I then cut, distressed and layered some of the papers in the Tiny Dancer line. I added some twine and few Imaginisce jewels. Now for the fun part, the inside! On the inside you can “wind up” the little ballerina, close the card and when the recipient opens it she will twirl for them! :)
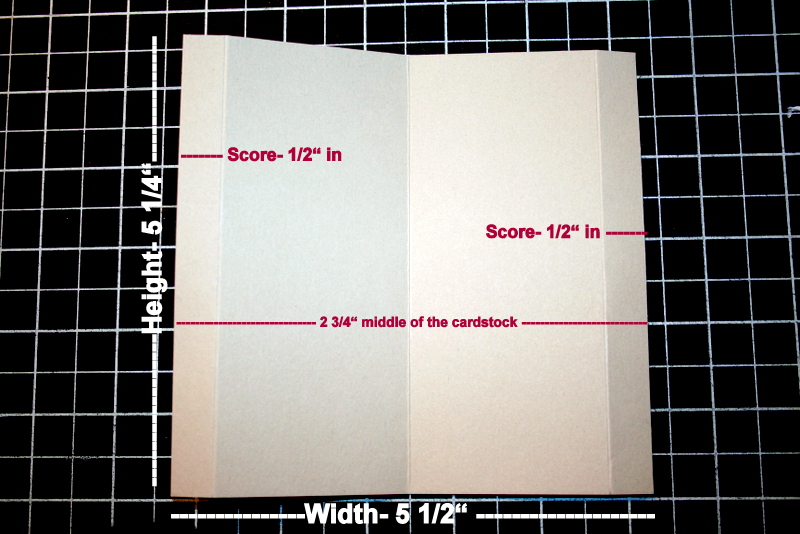
I started out with a strip of cardstock 5 ½” wide by 5 ¼” tall. I scored the strip ½” in from each side and also in the middle 
at 2 ¾”.
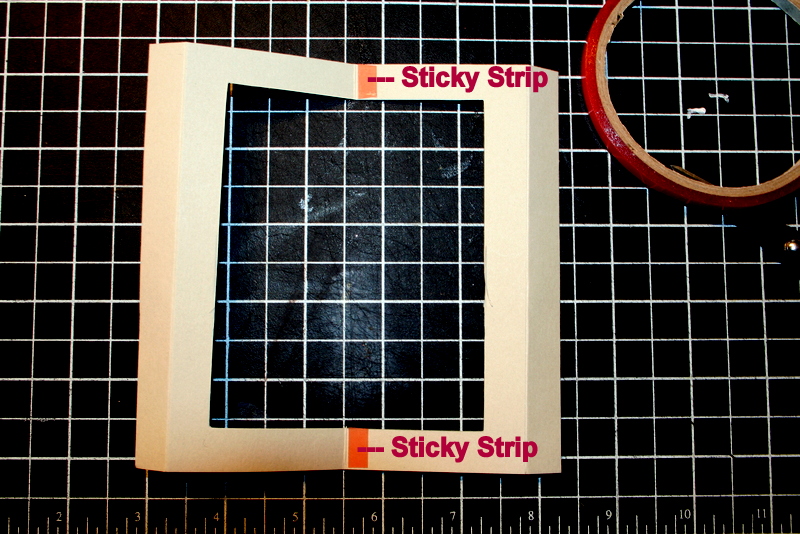
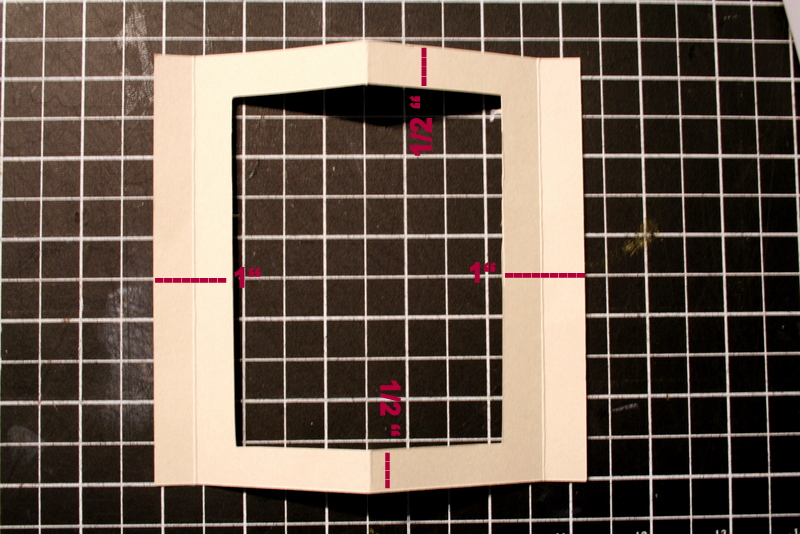
Then I cut out the middle leaving 1/2" on the top and bottom and 1" on each side like in the picture below.
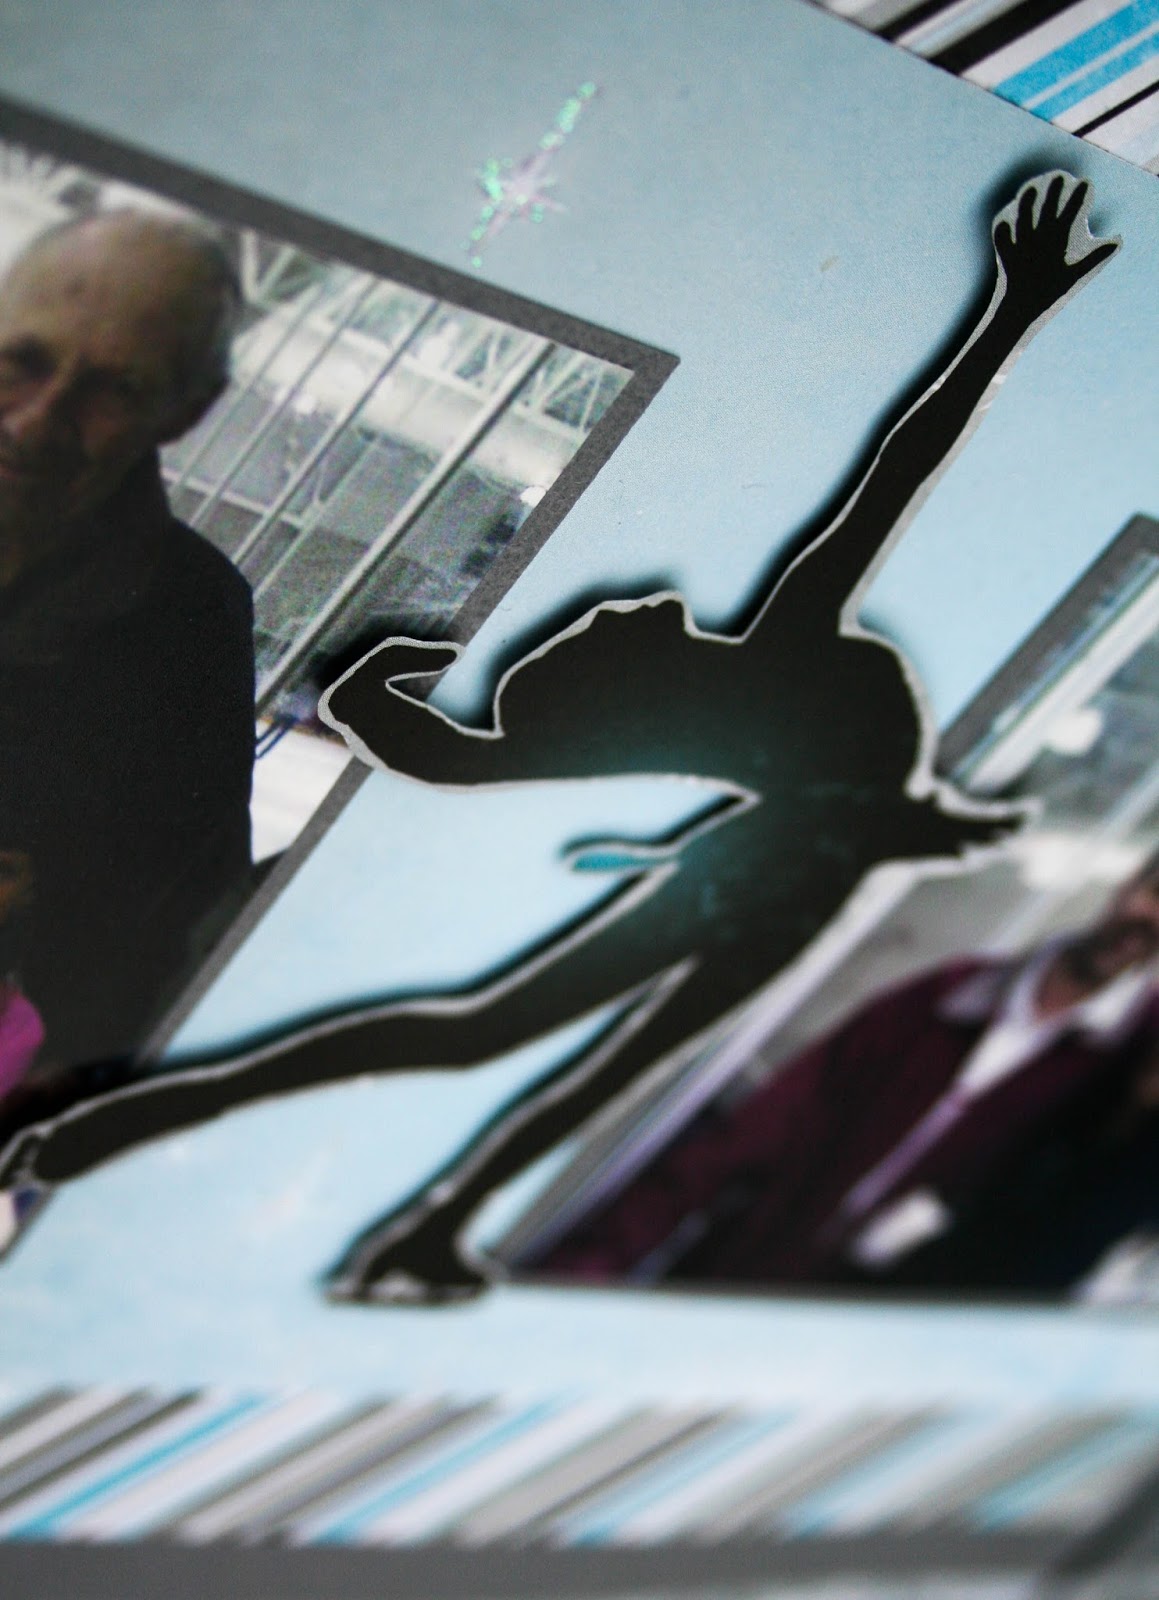
Now, since the little dancer in the middle spins, I needed two identical pieces. I fussy cut the dancer twice out of the Cutout sheet, then I placed some Sticky Strip right down the middle of the back of one. Next, I centered a long piece of dental floss on the Sticky Strip. I then stuck the two little dancers together with the Sticky Strip plus some additional adhesive around the edges.
Next you are going to take some small pieces of Sticky Strip and place right next to the middle score line on the top and bottom like the picture below.
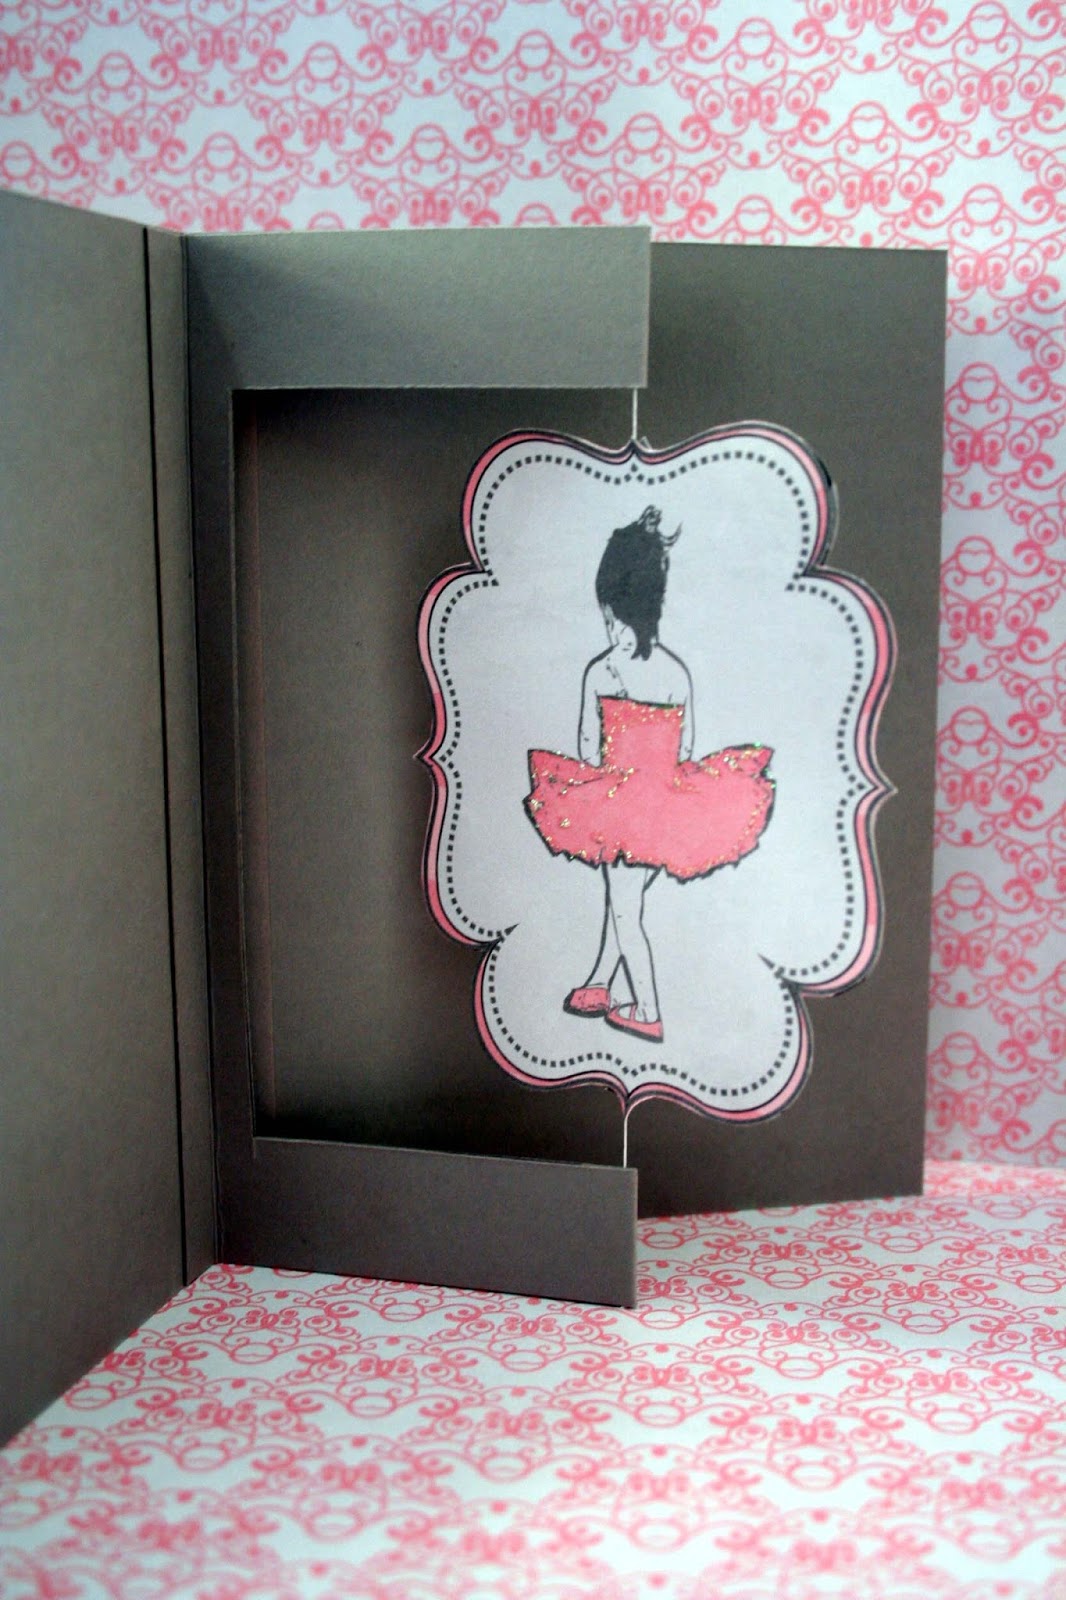
You then center the dancer vertically in the frame, pull the dental floss ends tight across the short bits of Sticky Strip, and close the piece of cardstock together, sandwiching the floss in between. Next trim the floss flush with the top and bottom of the frame. I wish I had a picture to show you but I forgot to take any more pictures! :( I then applied more sticky strip down the "tab" sides of the frame, and glued them into the card. Here's a close up of the inside of the card.
Notice how the floss suspends the dancer in the frame. This allows her to be "wound" and then to spin once the card is opened. Once you are done you should be able to just "wind" her up and close the card to give your recipient a lovely surprise! :)
Thanks for stopping by!

Moxxie Products Used:

TD- 1505 Luv 2 Dance
TD- 1506 Tiny Dancer Cutouts

Friday, January 9, 2015

Moxxie {New Line Blog Hop}

Hello!
Thanks so much for joining us for Moxxie's 2015 Winter Release Hop!
We are SO excited to share all of these fabulous NEW lines with you!!

While the boss is away at CHA we thought we'd show you some of the fantastic projects our amazing Muses have already created using these wonderful lines.
You will be able to hop to each muse's blog to see all the details about their project and the entire line that they used for their project. So make sure to stick around to the end to see how you can enter to win!!

The new line I chose to work with is Winery. I love the deep rich colors and the fun alpha's that coordinate with it!
I'd like to share with you the layout I did using this gorgeous line. Right after Christmas my little family and I took off to Garden City, UT (which incidentally is only about 20 minutes away from Beaver Mountain Ski resort!) for a week long break. The girls and my husband took off skiing and I got the whole place to myself. It was utterly relaxing! As I'm sure you can tell from my picture! lol I love those quiet, relaxing moments!
 
I cut down my Fine Wine  page by about 1/2" on a side and along the top so I could then matte it onto some cardstock. Before doing that I did ink up the edges of my page with some Tim Holtz Vintage Photo Distress Ink (LOVE that stuff!). I then cut out some banners out of the papers in this line. Then created little swirls off to the sides using sequins and added a few Petaloo flowers.Here's a close up of the sequins & flowers.
I also did some fussy cutting of the wine glass on the cutouts and gave it some dimension with a few 3d-dots.
Thanks for stopping by! Hope you enjoyed my layout using Moxxie's GORGEOUS Winry line.
Don't forget enter the giveaway! :)

Don't forget to leave comments along the way. The more you comment the better chances you have to WIN!
You can also link an entry into our monthly challenge for a chance to WIN!

Here is our hop line up:


 To be eligible to WIN all you have to do is comment on the Moxxie blog.
(US addresses only please) 
Extra chances to win include:
  Comment- on any (or all) of the designers blogs
  Facebook- share the blog hop post or one of the challenge posts (let us know by leaving a link on the Moxxie blog)
  Pinterest- pin any (or all) of these wonderful projects (leave a link for each pin on the Moxxie blog)
  Challenge- Enter your paper-made take on our sketch challenge! 3 extra entries if you use MOXXIE product! Link directly to your project or project post. (link up using the inlinkz tool at the bottom of this page)
Commenting and Challenge end Jan 31st.
Winner announced Mon. Feb 2nd.

Happy Hopping!

Thursday, January 8, 2015

Moxxie {Sketch Challenge- Winterland layout}

Good morning! I just wanted to share with you real quick another fun layout I created using Moxxie's Sketch Challenge
I basically did the same thing I did on this layout and just stretched the sketch out into a 2 pager. Some of the fun details I did on it were I used a punch to give me beautiful snowflake border and then used the punched out flakes and sprinkled them across the top. I also added some Stickles the punched out flakes and traced some of the snowflakes from the Winterland paper that I could see through the vellum. I love how it turned out and gave it a bit of dimension. Here's a few close ups.
Have you been creating so you can enter Moxxie's sketch challenge giveaway for one of their new amazing lines!? Can't wait to see what you do! :)
Thanks for stopping by!

Moxxie Product Used:

WN-1480 Frozen
WN-4024 Winterland Diecuts

Monday, January 5, 2015

Moxxie {Sketch Challenge}

Hello! Today I want to share with you a fun sketch challenge that Moxxie is doing!
Here's the sketch.... 
Moxxie Sketch by Samantha Taylor.bmp
Such a fun sketch! I chose to stretch it out into a two page layout using Moxxie's Ice Skating line.
I extended the elements across both pages and did some fussy cutting for the title, covered it in some Stickles to "bling" it up bit and then used some some 3D-dots to add some dimension. I also fussy cut out the ice skater and used the 3D-dots on it as well. Here's some close up pictures of some of the details.
Now it's your turn! Come join us and link up your project, HERE! Also watch for more fun examples from the other Muses up on the Moxxie Blog.
Thanks for stopping by! :)


Moxxie Products Used:

SK-1060 Toe Pick
SK-1062 Triple Axle
SK-2135 Ice Skating Cardstock Sticker

Sketches in Thyme {Bright}