Wednesday, May 27, 2015

Moxxie {3- Happy Birthday Cards}


Good Morning! How was everyone's Memorial Day weekend? It was quiet and rainy around my place, but very welcomed. The kids are mostly done with activities and out of school for the summer.  I'm ready for life to slow down for just a little bit! ;)

Today I want to share with you some really fun Birthday cards I made using one of Moxxie's new lines- Magical Moments. 
This line is so bright and colorful! I love how the colors are perfect for summer but it's the perfect line for any Disney trip layouts or projects! Such a cute fun line. Want to see the cute Birthday cards I made using that adorable line? ;)
The really awesome part is when you open them! I used the same technique on all three for the inside but they all look different. We'll start with the first card on the left. The base of this card is black cardstock I then cut out a piece from the Magical Moments Cutouts and layered. Next I stamped the sentiment right onto the cutout.
Now for the inside.....  
I created a little "gift" with some balloons that I cut out freehand out of some of the scraps I had from this same line. Then tied on some bakers twine to the ends of them and stamped my sentiment along the top.

For the next card I started out with a red sheet of cardstock for the base. I then rounded up some scraps I had and cut the ends to created little banners. Then using a black journaling pen to create some faux stitching around the edge. 
Onto the inside. I love stars! I just fussy cut them from the sheet Wishes and adhered them all over.

Last but definitely not least..... For this one I used a yellow cardstock base layered with a piece from the sheet Dreams Come True. Next I added "Happy Birthday" using Moxxie's Black Alpha's. I then used the banner from the sticker sheet, added some Imaginisce jewels in between each one and a few by the sentiment.
If you thought one "gift" was cute, in the first card you'll really love this one! I love how adorable the gifts look stacked up. I wrapped some ribbon on each one and added bows, to really make them look like gifts
Now I told you at the beginning that I had used the same technique for the inside of all three cards. I found this awesome pin on Pinterest and had to give it a try. To see it Click HERE
I loved how fun and easy these cards were to make! 
Thanks for stopping by! :)


Moxxie Products I used:

MAG 1531- Daisies
MAG 1532- Wishes
MAG 1533- Dreams Come True
MAG 1534- Miss Mouse
MAG 1535- Magical Cutouts
MAG 2295- Magical Cardstock Stickers

AL 2278- Black Alpha

Thursday, May 14, 2015

Moxxie {Live to Play Layout}

Hello! I have a fun layout to share with you today! The best part is I'm using Moxxie's new Softball line and NOT using it for anything softball! I love doing that with lines! It's a bit challenging for me at times but I really love the challenge. I totally love the end result! lol Ok, I won't tease you any more here is my layout.
This picture is of my two younger sisters and my first daughter. Pulling out this picture brought back so many fun and fond memories. Love those girls!
My base a sheet from Moxxie's new softball line called Fastpitch. Then as I started digging through some of my stash I found these cute hearts I had cut out using my Silhouette Cameo a looong time ago and they had just been sitting around waiting for the perfect layout. :) I layered on top of some dark brown cardstock to really make it stand out. I inked up the edges with some Prima Chalk Ink- Knotted Wood. I then started adding in elements from the cut out sheet and the stickers all over that didn't necessarily say Softball. Here's some close up's.
I did add some ink splatters all over the page. Also added a few staples and some brads for some added texture!

Thanks for stopping by! :)


Moxxie Product I used:

FP-1540 Batter up
FP-1541 Softball Cutouts
FP-2298 Fastpitch cardstock sticker
AL-2281 Brown Alpha

Friday, May 1, 2015

Moxxie {Blog Hop}

Good morning! Is it really May already!? These months are just flying by! But if it’s a new month it means it’s time for another MOXXIE blog hop! I don’t know about you but I always look forward to seeing everyone’s amazing projects! The Muses always seem to pull out all the stops to create some amazing things!  Make sure you read to the bottom to find out how to WIN one of these fantastic NEW lines!!

For today’s blog hop, out of the three BRAND NEW awesome lines, I was given the new softball line- Fastpitch to work with.

 This one was a bit of a challenge for me because the extent of sports in our household are Soccer, Dance & Tumbling! So I wasn't sure what I was going to do at first but in the end I decided I wanted to show you different ways to use this gorgeous line!
What do you think? 
I love the colors and the designs on these papers! For the notebook I used a mini composition notebook and covered front and back leaving the original tape for the binding uncovered. I then inked up the edges with Prima Chalk Ink - Knotted Wood. Then using some of the awesome cardstock stickers that go with this line I, created a little banner and tied some linen thread onto the ends. To make them stand out a bit more, I traced around them with a fine dark brown pen. 
The flowers, I punched out with a couple of Stampin’ Up! Punches; I layered them and added a button. Then I used Moxxie’s Brown Alpha’s to spell Notes.
Such a cute little notebook to carry in your purse!

Now for my favorite! The cute little box! This turned out adorable!
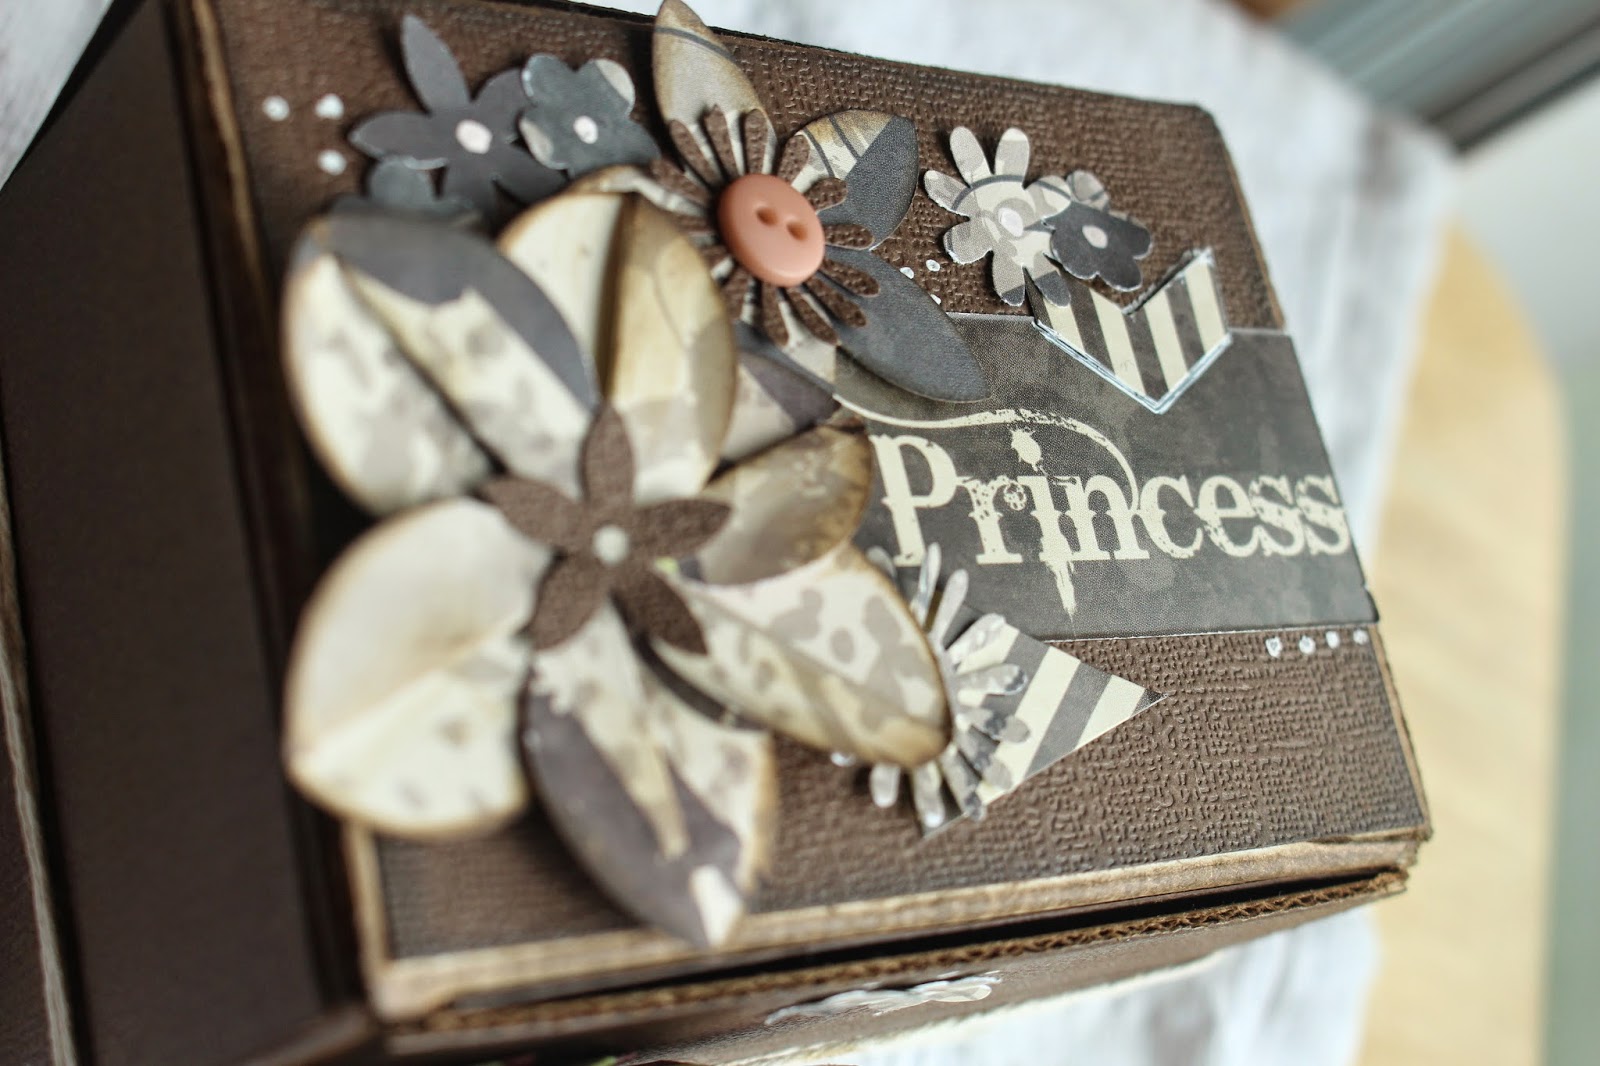
I started out by taking some dark brown cardstock and cutting it down to fit the faces of the box. I then inked the edges with Prima Chalk Ink - Knotted Wood. Now for the really fun part! I followed this TUTORIAL for this quick and easy, but super cute flower! Then for additional ones I had some Stampin' Up! punches. I wrapped the twine around the box several times (this box opens from the top) and then spread it out to to draw more attention to the flower. 
I added some buttons to the middle of a few flowers and used a white pen to draw a few dots here and there. I also added in some cardstock stickers on the top. Now for the "Princess" sticker I cut apart a bigger sticker it was a part of. Don't be afraid to do something like that! :) Here's a couple shots of the top.
And what do we always need to do when we create such an adorable box!? Well, I always feel the need to fill it with chocolates! ;)

Join us showing off these fun new lines!
You can leave a comment on each of our designers' blogs for an extra entry into our giveaway.


What's the prize you ask?
You can PICK which line you receive if you WIN!

How do I WIN you ask?
Just leave a comment on the Moxxie blog hop post. 

You get extra chances to WIN by commenting on our designers' blogs and sharing with your friends. Just let us know how you shared in a comment on the Moxxie blog.

Good luck! Thanks for stopping by! :)


Moxxie Products I used:

FP- 1539 Play with the Heart
FP-1540 Batter Up
FP- 2298 Fastpitch Cardstock Sticker

AL- 2281 Brown Alphas

Sketches in Thyme {Bright}