Showing posts with label linen thread. Show all posts

Friday, May 1, 2015

Moxxie {Blog Hop}

Good morning! Is it really May already!? These months are just flying by! But if it’s a new month it means it’s time for another MOXXIE blog hop! I don’t know about you but I always look forward to seeing everyone’s amazing projects! The Muses always seem to pull out all the stops to create some amazing things!  Make sure you read to the bottom to find out how to WIN one of these fantastic NEW lines!!

For today’s blog hop, out of the three BRAND NEW awesome lines, I was given the new softball line- Fastpitch to work with.

 This one was a bit of a challenge for me because the extent of sports in our household are Soccer, Dance & Tumbling! So I wasn't sure what I was going to do at first but in the end I decided I wanted to show you different ways to use this gorgeous line!
What do you think? 
I love the colors and the designs on these papers! For the notebook I used a mini composition notebook and covered front and back leaving the original tape for the binding uncovered. I then inked up the edges with Prima Chalk Ink - Knotted Wood. Then using some of the awesome cardstock stickers that go with this line I, created a little banner and tied some linen thread onto the ends. To make them stand out a bit more, I traced around them with a fine dark brown pen. 
The flowers, I punched out with a couple of Stampin’ Up! Punches; I layered them and added a button. Then I used Moxxie’s Brown Alpha’s to spell Notes.
Such a cute little notebook to carry in your purse!

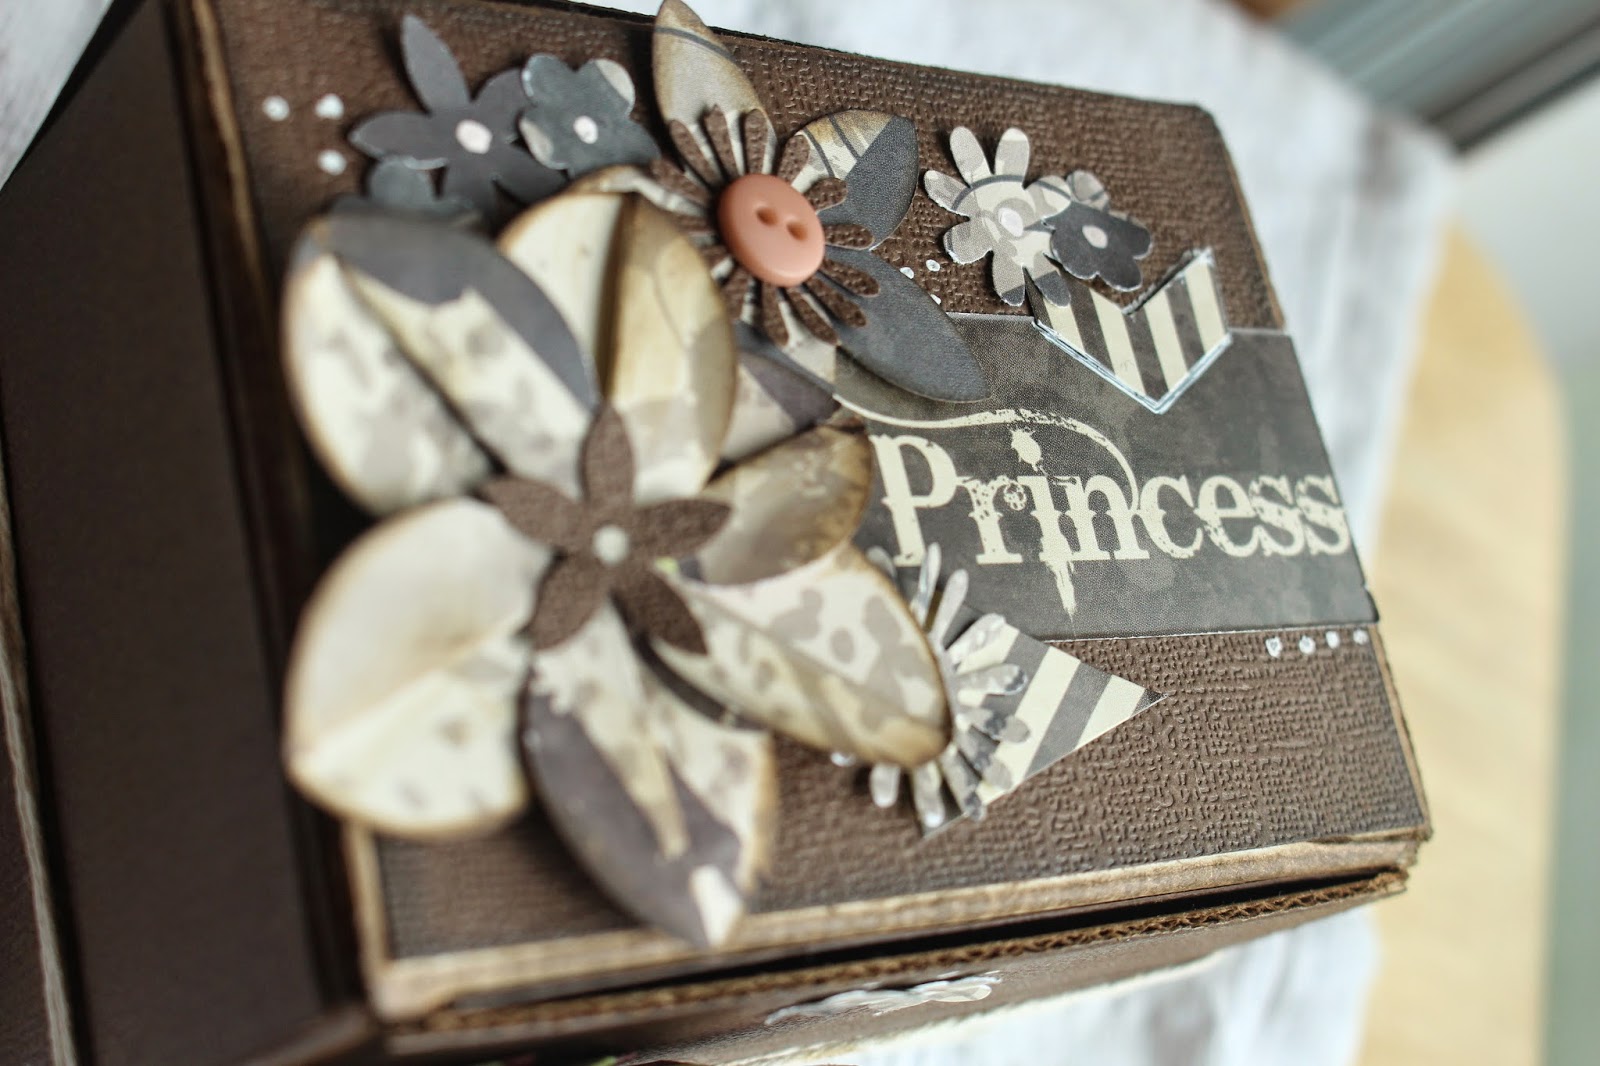
Now for my favorite! The cute little box! This turned out adorable!
I started out by taking some dark brown cardstock and cutting it down to fit the faces of the box. I then inked the edges with Prima Chalk Ink - Knotted Wood. Now for the really fun part! I followed this TUTORIAL for this quick and easy, but super cute flower! Then for additional ones I had some Stampin' Up! punches. I wrapped the twine around the box several times (this box opens from the top) and then spread it out to to draw more attention to the flower. 
I added some buttons to the middle of a few flowers and used a white pen to draw a few dots here and there. I also added in some cardstock stickers on the top. Now for the "Princess" sticker I cut apart a bigger sticker it was a part of. Don't be afraid to do something like that! :) Here's a couple shots of the top.
And what do we always need to do when we create such an adorable box!? Well, I always feel the need to fill it with chocolates! ;)

Join us showing off these fun new lines!
You can leave a comment on each of our designers' blogs for an extra entry into our giveaway.


What's the prize you ask?
You can PICK which line you receive if you WIN!

How do I WIN you ask?
Just leave a comment on the Moxxie blog hop post. 

You get extra chances to WIN by commenting on our designers' blogs and sharing with your friends. Just let us know how you shared in a comment on the Moxxie blog.

Good luck! Thanks for stopping by! :)


Moxxie Products I used:

FP- 1539 Play with the Heart
FP-1540 Batter Up
FP- 2298 Fastpitch Cardstock Sticker

AL- 2281 Brown Alphas

Saturday, April 4, 2015

Moxxie {Happy Easter Cards}

Good Morning! Today I've got two very cute and fun cards to share with you! I paired two unlikely new Moxxie lines together for these cards.... Grid Iron & Tiny Dancer.
Pairing these two lines together made the cutest Easter cards! Here's the first one...
I used my Silhouette Cameo to cut out the little bunny that I downloaded from Miss Kate Cuttables out of a sheet from Grid Iron, love the richness of that brown. Then I used a sheet from Tiny dancer to cut out the intricate egg. I tied a know in some ribbon and trimmed the ends and adhered it with a glue dot to the bunny. For the sentiment I used a stamp from a Stampin' Up! Stamp set- Just So Sayings and stamped it on a small piece of white cardstock that I cut the corners on to shape into a tag, punched a hole and threaded some linen thread through it then tied it onto the pink bow.

Want to see the next one? Ok, I won't tease you anymore. ;) Here's my 2nd card.
I used the scrap left behind from cutting out the bunny for the previous card to create this one. I layered it the pink cardstock that I used for my base and traced the bunny out and cut the shape out. I then adhered the brown layer on top of the pink, now my card front has a bunny shaped hole! ;) For the inside of the card I added a cute polka doted sheet from Tiny Dancer. Next, I added a little white pom-pom for the tail and tied a mini bow adhering it about where it's neck should be. Then I added 3 little enamel dots on the outside. Here's a look of the inside.
Just a little different but I love how cute and simple it turned out. 
Thanks for stopping by! :)


Moxxie Product I Used:
TD-1503 Born to Dance
TD-1504 Shine

GI-1469 Football

Friday, April 3, 2015

Moxxie {Easter Basket with Treat & Blog Hop}

I have a fun little project to share with you that's perfect for Easter! I used the beautiful new Springtime line from Moxxie aaaand it's the line you can win on our Moxxie blog hop! More details on how to enter at the end.
The colors are gorgeous and perfect for this project! I had so much fun creating this cute little basket and the adorable little treat that sits in it.
I started out with a full 12x12 sheet and scored in 3 inches from all sides. By doing that it should create squares in all four corners, I then went around and only cut one side of each square. Then you should be able to fold along the scored lines and have it start looking like a basket. I added adhesive to those squares and stuck all the sides together. Then to create the handle I cut two 1 inch strips adhered them together and onto the basket. Then added a brad on each side for additional support. 
For the front I took three different colored strips and used a Martha Stewart punch. I then added the swirly and tag from an older Moxxie line called Spring has Sprung.
Now for that adorable little "carrot" that is sitting in the basket. 
I followed an excellent tutorial HERE. On how to create this cute little "carrots". For a few extra details I used some green staples to hold the top and used a tag from the Spring has Sprung line and tied it on with some yellow twine.
Isn't that the sweetest bunny!? Here's a shot of the whole basket.

Now for more information about our amazing MOXXIE blog hop!
Here is our line up of inspiration:
(remember to comment along the way for more chances to WIN!)


All of the ways you can enter to WIN!: 
 Comment on the Moxxie blog.
(US addresses only please)
Extra chances to win include:
1- Comment- on any (or all) of the designers blogs (1 entry per comment per blog)
2- Facebook- share the blog hop post or one of the challenge posts (let us know by leaving a link on the Moxxie blog)
3- Pinterest- pin any (or all) of these wonderful projects (leave a link for each pin on the Moxxie blog)
4- Challenge- Enter your paper-made take on our SPRING challenge using the link up on the Moxxie challenge post. 3 extra entries if you use MOXXIE product! Link directly to your project or project post. (If it doesn't link directly to the page containing your project, it will be removed)
Commenting and Challenge end April 30th.
Winner announced Fri. May 1st.

Thanks for stopping by! :)


Moxxie Products I Used:
SPR-1520 Dandelion Wishes
SPR-1521 In Bloom
SPR-1522 Take Flight
SPR-1524 Springtime Cutouts

SS-4011 Spring Double Sided Diecuts
SS-2212 Element Sticker

Wednesday, February 11, 2015

Layout {CUTE }

My how time has passed! My oldest, who is grinning so proudly in the top picture at becoming a big sister, will be 13 years old this month!

I created this layout using this sketch from  ACOT (A Cherry on Top) that they had for a sketch challenge.
It was fun sketch to play with. I started my base out with a sheet from Moxxie's Faith line and then pulled out Moxxie's Springtime line to start layering, embellishing and punching. :)

Here for the title I used a wooden veneer and sponged on some white ink. I then adhered it to the little banner I had cut out and done a bit of punching on and added an eyelet and threaded some linen thread through the eyelet and then adhered it to my layout with some 3D-Dots to give it some dimension.
I tucked a cute little paper doily behind the corner of one of my pictures and then added some of Moxxie's cardstock stickers right onto my picture. I love the colors.
I fussy cut a butterfly out of one of Moxxie's Springtime sheets, inked the edges with some white ink and adhered it to a wooden arrow. I punched the sides of my purple piece (as you can see below) with a Martha Stewart punch. I love this punch, it looks so beautiful and delicate to me.
I love how the overall layout turnout. Here's another look at it.
Thanks for stopping by! :)

Friday, November 21, 2014

Scrap It Girl {Favorite Thing Friday: Favorite Fall Project}

Good morning! Today's Scrap It Girls Favorite Thing Friday is your Favorite Fall Project. Mine is a fall layout and I love how it turned out! I used Moxxie's new fall line- Autumn Glory. This line is absolutely gorgeous and the colors are so rich. This is my current favorite fall line!
Seriously, I don't believe pictures do this line justice. You definitely need to get your hands on this line. Here is my layout. I used some pictures of my second daughter when she was close to 18 months old (she's now 10 years old! Where did the time go!?) playing out in the leaves I was raking. 
I cut about a quarter inch off the top and side of one sheet and layered on another. Did some fussy cutting of the flowers and layered them using 3D-Dots over the ones that were there. Also did some inking with Tim Holtz Vintage Photo Distressing Ink around the edges of the flowers to make them "pop" a bit more.
I used the cardstock stickers that coordinate with the paper, for the title and the banners. Punched a border using a Martha Stewart punch. I love how this layout turned out. Go, stop by Scrap It Girl's blog and see some other favorites!
Thanks for stopping by! :)


Monday, November 17, 2014

Moxxie {Love}

Good Morning! I have another layout to share with you! I used Moxxie's line Autumn Glory on a previous layout and totally fell in love with the gorgeous line. If you still haven't looked at it please take a minute to check it out HERE. Here is my layout.
I just love the elegance of this line. I cut off a quarter inch off the top and side of the top sheet, did some inking with Tim Holtz Vintage Photo Distressing ink around the edges and layered it on top of a sheet of Doodlebug cardstock. I used some other sheets from the same line to layer the picture and create the side banners along with embossing and sanding down one the layers under the picture. Here's some close up's of some the embellishments and details.
For my journaling tag I used some 3D-Dots along the edges of the picture to pop it up and create a little slotted area for my tag to slide into.
Thanks so much for stopping by! :)


Moxxie Product Used:
AG-1454 Fanciful Flowers
AG-1455 Season's Beauty
AG-1456 Foliage in Flight
AG-1457 Beautiful Bouquet

Other Products:
UmWow Studio chipboard embellishments
Sweet Stamp Shop Stamp
Craft Medley cup sequins
SU! Linen Thread
Sizzix Banners #2 stamps & framelits
Cuttlebug Stylized Flowers embossing folder
Tim Holtz Distress Ink
Fancy Pants large decorative tags
3D-Foam Dots

Friday, November 7, 2014

Moxxie {Autumn Glory Cards & Blog Hop}

Good morning! Fall is in full swing here. The leaves have all changed their colors and are falling off. I love walking through them and hearing them crunch under my feat. It's just gorgeous around here. I love this time of year. I have some fall cards and a fun blog hop with a great giveaway to share with you today! I want to start by showing you my cards! :)
I really love how Moxxie's line of Autumn Glory really captures fall. On my Thank You card I used a Martha Stewart punch, some Bazzil Basics Paper Leaves, ribbon and a SU! stamp for the sentiment.
On this one I did a bit of fussy cutting that I "popped" up with some 3D-dots to add a little dimension. I also did some distressing and tied it off with some linen thread.
For the third card I used an embossing folder and sanded it down along with some distressing along the edges. I fussy cut around some flowers from the sheet Bountiful Bouquet and inked up the edges. Then layered them up with 3D-dots to give it some dimension.
I really love how all three cards turned out.

And of course for the blog hop info and like I said, there is a PRIZE involved!
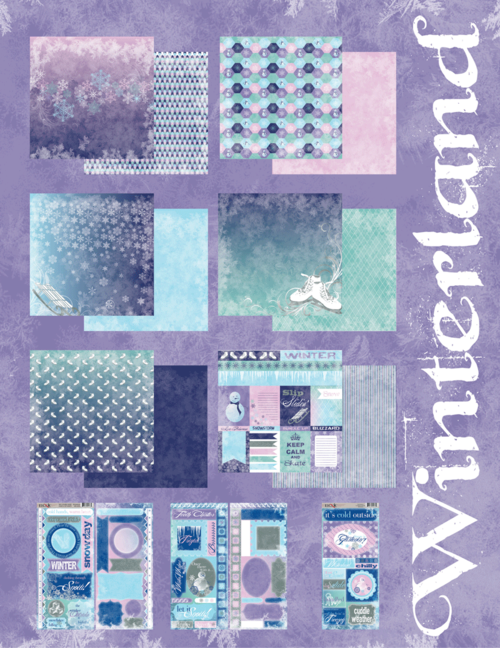
None other than the amazing New Winterland!!!
This line has a fantastic color combo, fun patterns and cute embellishments for all of your wintertime activities!


Details on how to WIN this line are below.


 To be eligible to WIN all you have to do is comment on the Moxxie blog (US addresses only please). 
Extra chances to win include:
  1- Comment- on any (or all) of the designers blogs
  2- Facebook- share the blog hop post (let us know by leaving a link on the Moxxie blog)
  3- Pinterest- pin any (or all) of these wonderful projects (leave a link for each pin on the Moxxie blog)
  4- Challenge- Enter your card in our challenge! 3 extra entries if you use MOXXIE product! 
Link directly to your project or project post. (link up using the inlinkz tool at the bottom of this page)
Commenting and Challenge end Nov 30th.

Good luck & Thanks for stopping by! :)


Moxxie Products Used:

AG-1454 Fanciful Flowers
AG-1455 Season's Beauty
AG-1457 Bountiful Bouquet
AG-2271 Autumn Cardstock Sticker

Saturday, November 1, 2014

Scrap It Girl {Mixed Media Thank You card & new challenge}

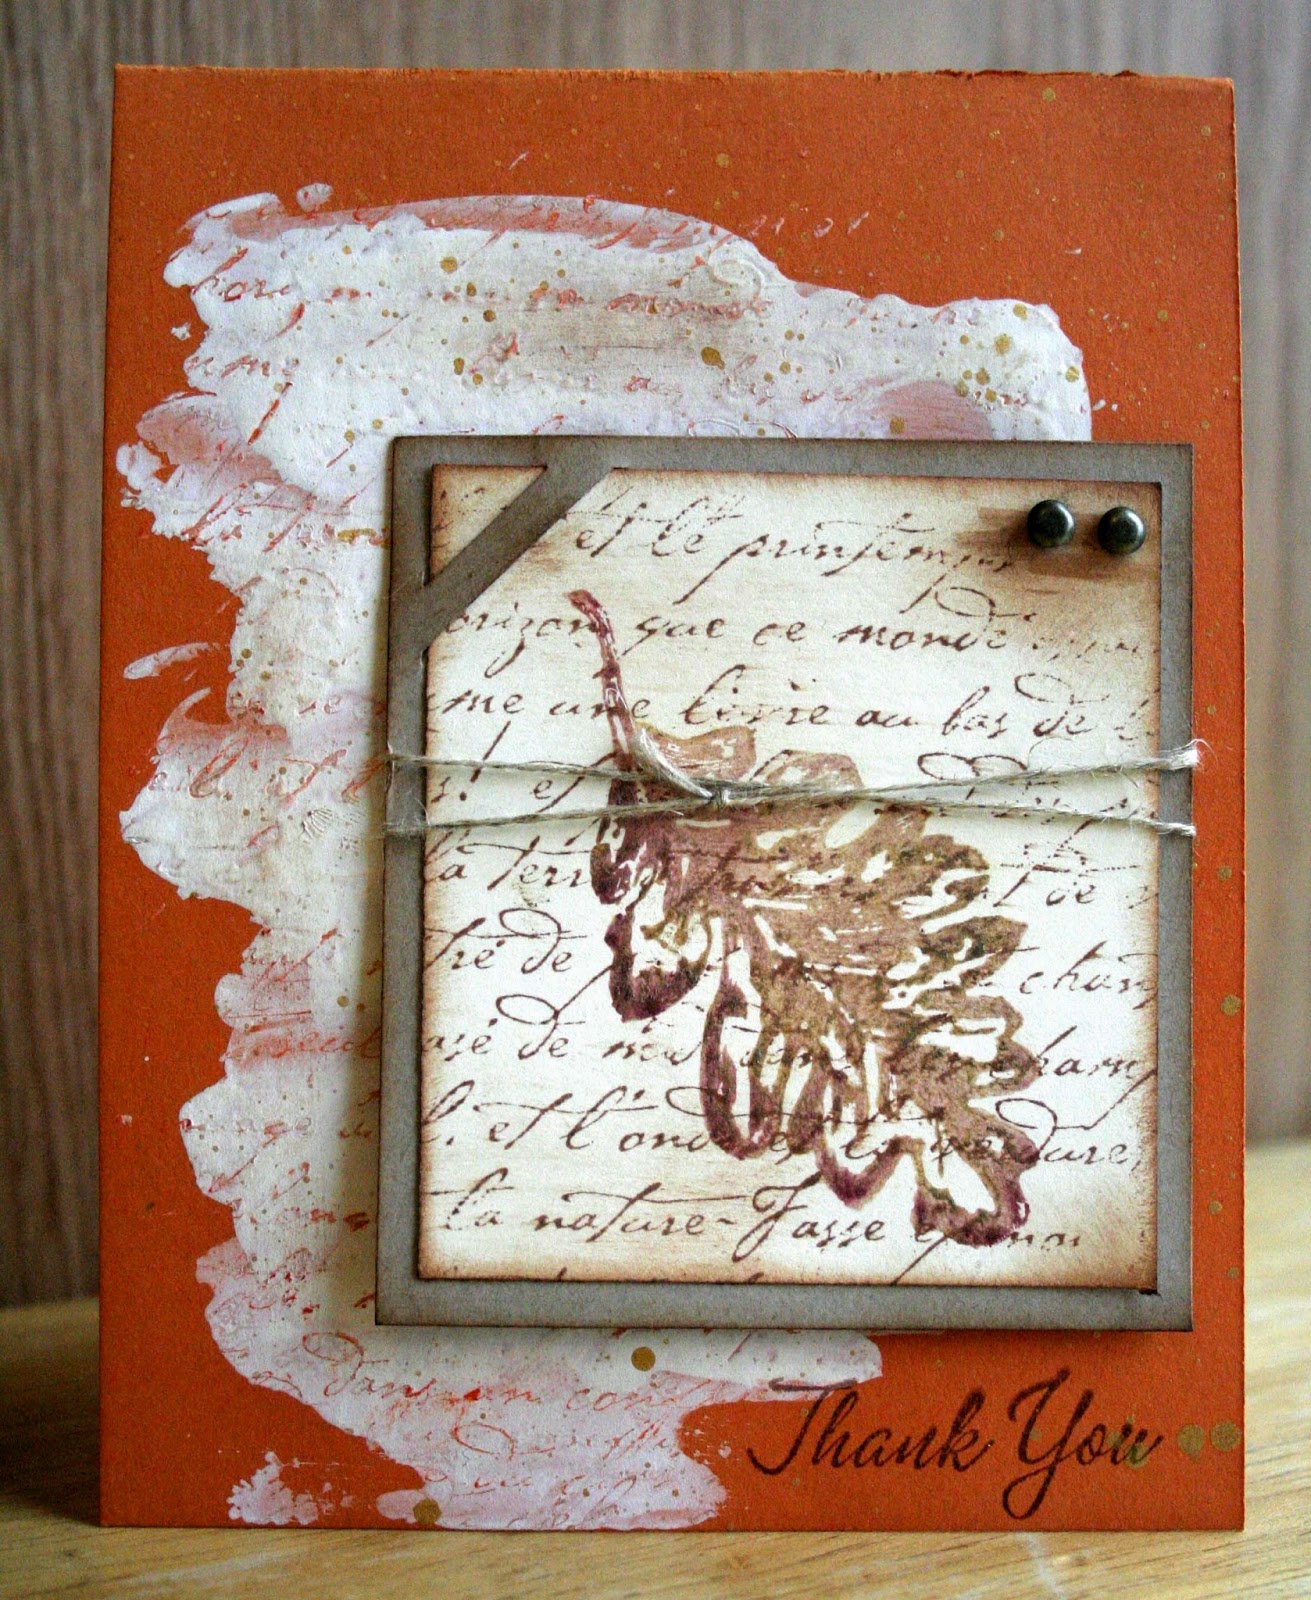
Happy November 1st! It's time for a Scrap It Girl monthly challenge! This one is fun one! For this challenge we challenge you to use mixed media such a paints, water colors or gelatos. Here's a card I made using gelatos & gessso.

I started out out with a 4.25" x 5.5" card base and smeared some gesso around on the card. I ran an orange gelato over SU! French Script and stamped it into the gesso. I love the effect, the script stands out a bit more because of the orange. After the gesso dried I spritzed it with some Heidi Swapp Gold Color Shine. For the leaf I applied two different colors directly on the stamp I used a dark red watercolor crayon on half of it and then a overlapped just a bit of a gold gelato. Then I used a brush dipped in some water to go over the crayon and gelato and tried to mix the colors a bit. Next I stamped it on some cream cardstock. I used the same SU! French Script stamp that I stamped on the gesso to stamp over the leaf. I really love how beautiful it came out.  The picture really doesn't do it justice. The gold on the leaf from the gelato and the gold from color shine really make this card sparkle.
Being honest, I was really nervous doing this challenge because, while I do own these different mediums I just haven't made the time to play with them much. So I really enjoy the extra challenge to get me using them more. :)

Now make sure to head over to Scrap It Girl and join us for the challenge! Remember you are welcome to link up to two projects and they must contain paints, water colors or gelatos. We LOVE to see everyone's fun projects. Make sure to challenge yourself to try new things! :) 
Thanks for stopping by! :)

Tuesday, September 23, 2014

Moxxie {16 Fall cards with a One Sheet Wonder}

Hello! How is everyone doing? Today I have fun project to share with you using Moxxie's new line 
Autumn Glory I just love the deep, rich colors of this line.
I don't know about you guys but I'm always in need of a few "Thank You" cards. The easiest and fastest way to pump a few out is by using a One Sheet Wonder (a.k.a OSW) template. Have you ever heard of these? It's where you take a sheet of designer paper and you cut it up according to the template you have and allows you to create a bunch of different cards in a short period of time. It's a great way for me to use some of my cardstock scraps also. :) I've used this particular template a few times and I've been able to produce 14-16 cards, today I produced 16 cards.
Here's my 16 cards!
I used some Kraft cardstock as my base for all the cards and then found some different "Thank You" & "Thinking of You" sentiments in my stamps. Then found some cardstock scraps that matched along with the colors of my designer paper so that I could embellish and accent a bit more with it. I also used various embellishments such as linen thread, brads & twill tape along with inking along the edges using Tim Holtz Distress Ink Photo Vintage. Here's a close up the cards. 

Thanks for stopping by! :)


Moxxie Product Used:
AG-1456 Foliage in Flight

Monday, September 1, 2014

Scrap It Girl {Capture Life's Moments}

Happy Labor Day! Do you have some fun plans for today!? Well, if your fun plans include staying home to get your Craft on! I've got a fun challenge for you! Scrap It Girl's monthly challenge is up and running! The challenge for this month is Stencils or Masks. On my layout I used a cute little butterfly stencil I had from Paper Bakery Kits. 
I stenciled the butterflies directly onto my picture and the corner piece of blue paper using  Shimmerz Paints Texturz- Tidy Widy. I love the texture and bit of sparkle it has. 
Then to really draw attention to the beautiful butterfly in my picture I used a square punch and punched it out and created a frame to go around it and used 3D-Dots to really make it stand out.
I inked around the edges of my page with Tim Holtz Distress Ink- Pumice Stone and for the embellies I looked through a small box of buttons that I acquired from my husbands grandmother when she passed away. I love them! I also tied down a Tim Holtz word band with some linen thread.
My scrapbook layouts are usually of my daughters and our family but once in a great while it's fun to do a layout about what's around you. Thanks so much for stopping by and make sure to head over to Scrap It Girl's blog for the full details on the challenge and to see if YOU were the winner of last months challenge! :)

Sketches in Thyme {Bright}