Showing posts with label Ribbon. Show all posts

Wednesday, May 27, 2015

Moxxie {3- Happy Birthday Cards}


Good Morning! How was everyone's Memorial Day weekend? It was quiet and rainy around my place, but very welcomed. The kids are mostly done with activities and out of school for the summer.  I'm ready for life to slow down for just a little bit! ;)

Today I want to share with you some really fun Birthday cards I made using one of Moxxie's new lines- Magical Moments. 
This line is so bright and colorful! I love how the colors are perfect for summer but it's the perfect line for any Disney trip layouts or projects! Such a cute fun line. Want to see the cute Birthday cards I made using that adorable line? ;)
The really awesome part is when you open them! I used the same technique on all three for the inside but they all look different. We'll start with the first card on the left. The base of this card is black cardstock I then cut out a piece from the Magical Moments Cutouts and layered. Next I stamped the sentiment right onto the cutout.
Now for the inside.....  
I created a little "gift" with some balloons that I cut out freehand out of some of the scraps I had from this same line. Then tied on some bakers twine to the ends of them and stamped my sentiment along the top.

For the next card I started out with a red sheet of cardstock for the base. I then rounded up some scraps I had and cut the ends to created little banners. Then using a black journaling pen to create some faux stitching around the edge. 
Onto the inside. I love stars! I just fussy cut them from the sheet Wishes and adhered them all over.

Last but definitely not least..... For this one I used a yellow cardstock base layered with a piece from the sheet Dreams Come True. Next I added "Happy Birthday" using Moxxie's Black Alpha's. I then used the banner from the sticker sheet, added some Imaginisce jewels in between each one and a few by the sentiment.
If you thought one "gift" was cute, in the first card you'll really love this one! I love how adorable the gifts look stacked up. I wrapped some ribbon on each one and added bows, to really make them look like gifts
Now I told you at the beginning that I had used the same technique for the inside of all three cards. I found this awesome pin on Pinterest and had to give it a try. To see it Click HERE
I loved how fun and easy these cards were to make! 
Thanks for stopping by! :)


Moxxie Products I used:

MAG 1531- Daisies
MAG 1532- Wishes
MAG 1533- Dreams Come True
MAG 1534- Miss Mouse
MAG 1535- Magical Cutouts
MAG 2295- Magical Cardstock Stickers

AL 2278- Black Alpha

Saturday, April 4, 2015

Moxxie {Happy Easter Cards}

Good Morning! Today I've got two very cute and fun cards to share with you! I paired two unlikely new Moxxie lines together for these cards.... Grid Iron & Tiny Dancer.
Pairing these two lines together made the cutest Easter cards! Here's the first one...
I used my Silhouette Cameo to cut out the little bunny that I downloaded from Miss Kate Cuttables out of a sheet from Grid Iron, love the richness of that brown. Then I used a sheet from Tiny dancer to cut out the intricate egg. I tied a know in some ribbon and trimmed the ends and adhered it with a glue dot to the bunny. For the sentiment I used a stamp from a Stampin' Up! Stamp set- Just So Sayings and stamped it on a small piece of white cardstock that I cut the corners on to shape into a tag, punched a hole and threaded some linen thread through it then tied it onto the pink bow.

Want to see the next one? Ok, I won't tease you anymore. ;) Here's my 2nd card.
I used the scrap left behind from cutting out the bunny for the previous card to create this one. I layered it the pink cardstock that I used for my base and traced the bunny out and cut the shape out. I then adhered the brown layer on top of the pink, now my card front has a bunny shaped hole! ;) For the inside of the card I added a cute polka doted sheet from Tiny Dancer. Next, I added a little white pom-pom for the tail and tied a mini bow adhering it about where it's neck should be. Then I added 3 little enamel dots on the outside. Here's a look of the inside.
Just a little different but I love how cute and simple it turned out. 
Thanks for stopping by! :)


Moxxie Product I Used:
TD-1503 Born to Dance
TD-1504 Shine

GI-1469 Football

Thursday, January 8, 2015

Moxxie {Sketch Challenge- Winterland layout}

Good morning! I just wanted to share with you real quick another fun layout I created using Moxxie's Sketch Challenge
I basically did the same thing I did on this layout and just stretched the sketch out into a 2 pager. Some of the fun details I did on it were I used a punch to give me beautiful snowflake border and then used the punched out flakes and sprinkled them across the top. I also added some Stickles the punched out flakes and traced some of the snowflakes from the Winterland paper that I could see through the vellum. I love how it turned out and gave it a bit of dimension. Here's a few close ups.
Have you been creating so you can enter Moxxie's sketch challenge giveaway for one of their new amazing lines!? Can't wait to see what you do! :)
Thanks for stopping by!

Moxxie Product Used:

WN-1480 Frozen
WN-4024 Winterland Diecuts

Tuesday, December 23, 2014

Moxxie {Neighbor Gifts}

Good morning! I have some fun and very easy gifts you could put together. They make great neighbor gifts. :) They could easily be paired with a roll of wrapping paper & some tape. I used two of Moxxie's amazing lines- Winterland & Happy Pawlidays.
These are 6x6 sheet protectors that I decorated and turned into envelopes! The one on the left holds 3x3 cards and the other one holds some Christmas tags, even some for those furry friend gifts! :)
You start out with a 6x6 sheet protector and carefully cut off the side with the punched holes, make sure not cut the seam that keeps it closed! Then I cut out a 8 1/4" x 6 1/2" piece of cardstock, score it at 2" down from one of the long ends. Then you also need two pieces of designer paper- one to decorate the front side (so this can be any size) but for the insert that goes INSIDE of your sheet protector you need it to be 6" x 6 1/8". Next we will add some sticky tape to the back of your sheet protector and center and stick it the back side of your cardstock below the score line. Next you'll cut off the two corners at the top to make it look like an envelope flap and add a Velcro dot towards the center (I like to keep the dots together, stick it to one side then press down to stick it to the other side) It should look like this...
Now because you can see those sticky strips and they just aren't attractive! We insert the piece of designer paper you cut earlier, the 6" x 6 1/8" one.
Now make what ever you want to put inside of them!
I made some 3x3 cards for one and some cute little tags for the other.
Well I hope I've helped you out with a last minute gift idea!
Thanks for stopping by! :)


Moxxie Product Used:

WN-1480 Frozen
WN-1481 Snow Buddy
WN-1482 Slip Slidin'
WN-1483 Ice Princess
WN-1484 On the Edge
WN-1485 Winterland Cutouts
WN-4024 Winterland Diecuts
WN-2234 Winterland Element Sticker

HA-1458 Santa's Little Helper
HA-1459 Define Naughty
HA-1460 Merry Christmas
HA-1461 Pawliday Cutouts
HA-2272 Pawliday Cardstock Sticker

Other Products Used:
Twine
Wood Veneer
Stickles
Silver Cord
Silver Ribbon
3D-Dots
Stampin' Up! All Year Cheer 1 stamp set
Tim Holtz Vintage Photo Distress Ink

Friday, November 7, 2014

Moxxie {Autumn Glory Cards & Blog Hop}

Good morning! Fall is in full swing here. The leaves have all changed their colors and are falling off. I love walking through them and hearing them crunch under my feat. It's just gorgeous around here. I love this time of year. I have some fall cards and a fun blog hop with a great giveaway to share with you today! I want to start by showing you my cards! :)
I really love how Moxxie's line of Autumn Glory really captures fall. On my Thank You card I used a Martha Stewart punch, some Bazzil Basics Paper Leaves, ribbon and a SU! stamp for the sentiment.
On this one I did a bit of fussy cutting that I "popped" up with some 3D-dots to add a little dimension. I also did some distressing and tied it off with some linen thread.
For the third card I used an embossing folder and sanded it down along with some distressing along the edges. I fussy cut around some flowers from the sheet Bountiful Bouquet and inked up the edges. Then layered them up with 3D-dots to give it some dimension.
I really love how all three cards turned out.

And of course for the blog hop info and like I said, there is a PRIZE involved!
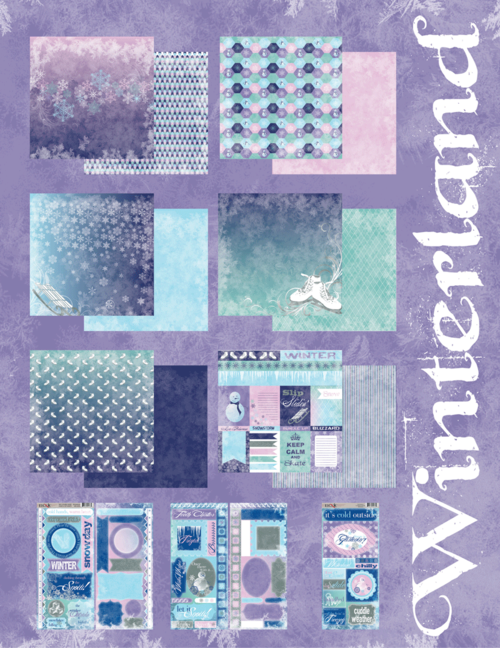
None other than the amazing New Winterland!!!
This line has a fantastic color combo, fun patterns and cute embellishments for all of your wintertime activities!


Details on how to WIN this line are below.


 To be eligible to WIN all you have to do is comment on the Moxxie blog (US addresses only please). 
Extra chances to win include:
  1- Comment- on any (or all) of the designers blogs
  2- Facebook- share the blog hop post (let us know by leaving a link on the Moxxie blog)
  3- Pinterest- pin any (or all) of these wonderful projects (leave a link for each pin on the Moxxie blog)
  4- Challenge- Enter your card in our challenge! 3 extra entries if you use MOXXIE product! 
Link directly to your project or project post. (link up using the inlinkz tool at the bottom of this page)
Commenting and Challenge end Nov 30th.

Good luck & Thanks for stopping by! :)


Moxxie Products Used:

AG-1454 Fanciful Flowers
AG-1455 Season's Beauty
AG-1457 Bountiful Bouquet
AG-2271 Autumn Cardstock Sticker

Wednesday, October 1, 2014

Scrap It Girl {Happy Birthday Card}

Happy October 1st! I LOVE this month! First of the month means it's time for Scrap It Girl's new challenge. This month we are using embossing folders! I've made a fun birthday card to share with you. 
I used Cuttlebug's Spots & Dots embossing folder and only embossed the top 3/4 of the card then wrapped some ribbon along the bottom of the embossed area. I then did heat embossing on the cute presents and the words. It was a quick and simple card, but love how cute it turned out! Now make sure to head over to Scrap It Girls blog for some awesome inspiration from the design team and to get your entries in! There is an awesome prize package for the winner! You can enter up to 3 projects! 
Thanks for stopping by! :)

Monday, August 25, 2014

Nuts About Sketches {Everyday Happiness}

Hello! I've got some fun news to share with you! I'll be staying on the Nuts About Sketches Design Team! I love Shawn's sketches! If you're a beginner or a seasoned veteran to sketches they are great for anyone. :) Here's today's sketch. I love all the little extra's in this sketch!
The pictures I used for my layout are of me and my girls hanging out for the day. I love hanging out with them! We love to have a fun girls day once in awhile. We sometimes go and get dessert at a cute little restaurant in Logan called Sweetly Divine. Always love their desserts.
I did a bit inking around the edges of all the layers and then a bit of faux stitching. Here's a few close ups.


Thanks for stopping by! :)

Friday, May 30, 2014

Favorite Things Friday {Scissors}

TGIF! What fun weekend plans do all of you have? It's time for Favorite Things Friday over at Scrap It Girl! Today we are doing scissors. The hard part for me was deciding on ONE set! But I reach for these beauties 9 out of 10 times. They are nice and sharp and great for getting in doing some fussy cutting around smaller images. 
Here's a tag I created but doing some fussy cutting  on it with those snazzy scissors. ;)
I stamped this cute dragon fly from my Stampin' Up! stamp set Bugs & Kisses twice. I then cut both of them out, keeping one intact but cut the second one apart so I just had the wings. I added some stickles to the second set of wings and then attached them with some 3D-Dots. Here's a close up of the wings.
I punched out the bottom of the blue tag with a Martha Stewart punch and then layered it onto a slightly larger white tag I had created and just cut around the punched area along the bottom. Then I tied some ribbon to the top of the tag to finish it off. So pretty don't you think?

Make sure to head over to Scrap It Girl and see what the design team members like to use and while you're there share with us your favorite pair of scissors! Thanks for stopping by! Have a great weekend! :)

Wednesday, February 12, 2014

Scrap It Girl & Heart Challenge

I have some amazing news! I am happy to announce that I am now a new member of the Scrap It Girl design team! 
She has monthly challenges and Favorite Things Friday. So please come check her out and join us in all the fun! Speaking of which, this month's challenge is HEARTS. There is also an amazing prize for the winner!

Let me start you out with a little bit of inspiration of my own but make sure to head over to fill that bucket with all the amazing projects that are linking up!

I love these pictures of my 2nd daughter. She is such a doll! She was into the chocolate from the moment she could crawl and now she 9 years old. Where does the time go!? The saying "Love Me & Feed Me Chocolate" came from when you were about 4 years old and you and I were having a rough day and I asked you "Whatever will I do with you?" and you answered with your cute little voice, "LOVE Me & Feed Me Chocolate!"

On this layout I inked around the edges of my 12x12 sheet with some Tim Holtz Distress Ink- Vintage Photo. I then added a full 8 1/2 x11 sheet of vellum, I love the "softness" that vellum seems to add. The mats behind the pictures are from Spellbinders Nestabilities.
I punched out all the little hearts the run up the left side of the page with a small heart punch I have on hand.  Then used my Silhouette to cut out the amper sign and the word Chocolate. I had so much with this layout!
Thanks for stopping by! Make sure you swing over to Scrap It Girl and check it out and join in the fun challenge! :)

Friday, May 31, 2013

My Super Girl!

Using two different challenges today to complete this layout. I combined the challenge at SCRAPtastic Club of incorporating some Pennants & Banners and Scrap It Girl's sketch.

sketchmay

I admit at first I was struggling at how I could combine both challenges when I found these perfect pictures of my oldest daughter! She was only 2 years old and LOVED to save mommies day all the time. Love her to pieces. So I pulled out my Scraptastic April 2013- 8 Days a Week Kit and went to work. This kit is full of really fun pennants & banners that I was really having a hard time not going overboard with them! As I started pulling out those cute little pennants I realized that I wanted to add a more feminine feel to my little Super Girls layout. I found some ribbon that I thought would give the perfect feel! Now, I LOVE LOVE LOVE ribbon. I love to collect it! So as I was going through my stash I found a package of ribbon from Stampin' Up! that I'd had for awhile. Bingo! Finally found the perfect page to use it on. I love "aha" moments like that, it makes my hoarding feel justified. ;) Anyone else do things like that? I hope I'm not alone!


Thursday, October 28, 2010

Naming Your Home

HowDoesShe? Did an amazing post here, titled  3 TRICKS to take the WORK out of housework a bit ago. It seemed to hit about the right time for me.  When it comes my home I really stress out a lot about it not being in tip top immaculate shape! I know I'm being a bit ridiculous, especially since I have 3 little girls that love to play and make messes :) But I really tend to work myself up into such a stressed out frenzy over the "mess" in my home. I become overwhelmed and then to top it off I am NOT a fan of  doing dishes or folding and putting away laundry. So coming across this post the other day really hit home! Here's a paragraph that I never get tired of reading:
 "The most important trick to taking the “work” out of housework is ATTITUDE.  If you can shift your paradigm about why we keep house, by altering your attitude, you have unlocked the key to happy homemaking.  Now go back and read that last sentence again.  If you can really do this, it will be very powerful."
   I have that post bookmarked and keep referring back to the other two tricks! One thing I really loved about it was that one of the 3 Tricks is naming your home. I know, I know it sounds a little weird but the idea is that you need to take pride and ownership of your home. For me this is really hard. We have found a few problems with the home we live in and it doesn't exactly fit our family any more.We would love to move and find a better and bigger place or even just build our own home, but that's not something we can do right now. So when I read that, I immediately latched onto that idea, anything to help me out! I immediately asked the girls to help me come up with a few names so we could pick out our favorite one. What we came up with was Cozy Cottage. It works great for our cute little home! So I went right to work at finding a way to create a sign for our new name. I went to the Dollar store bought two frames and then visited a hardware store for some little tiny i-bolts. The rest I had at home!

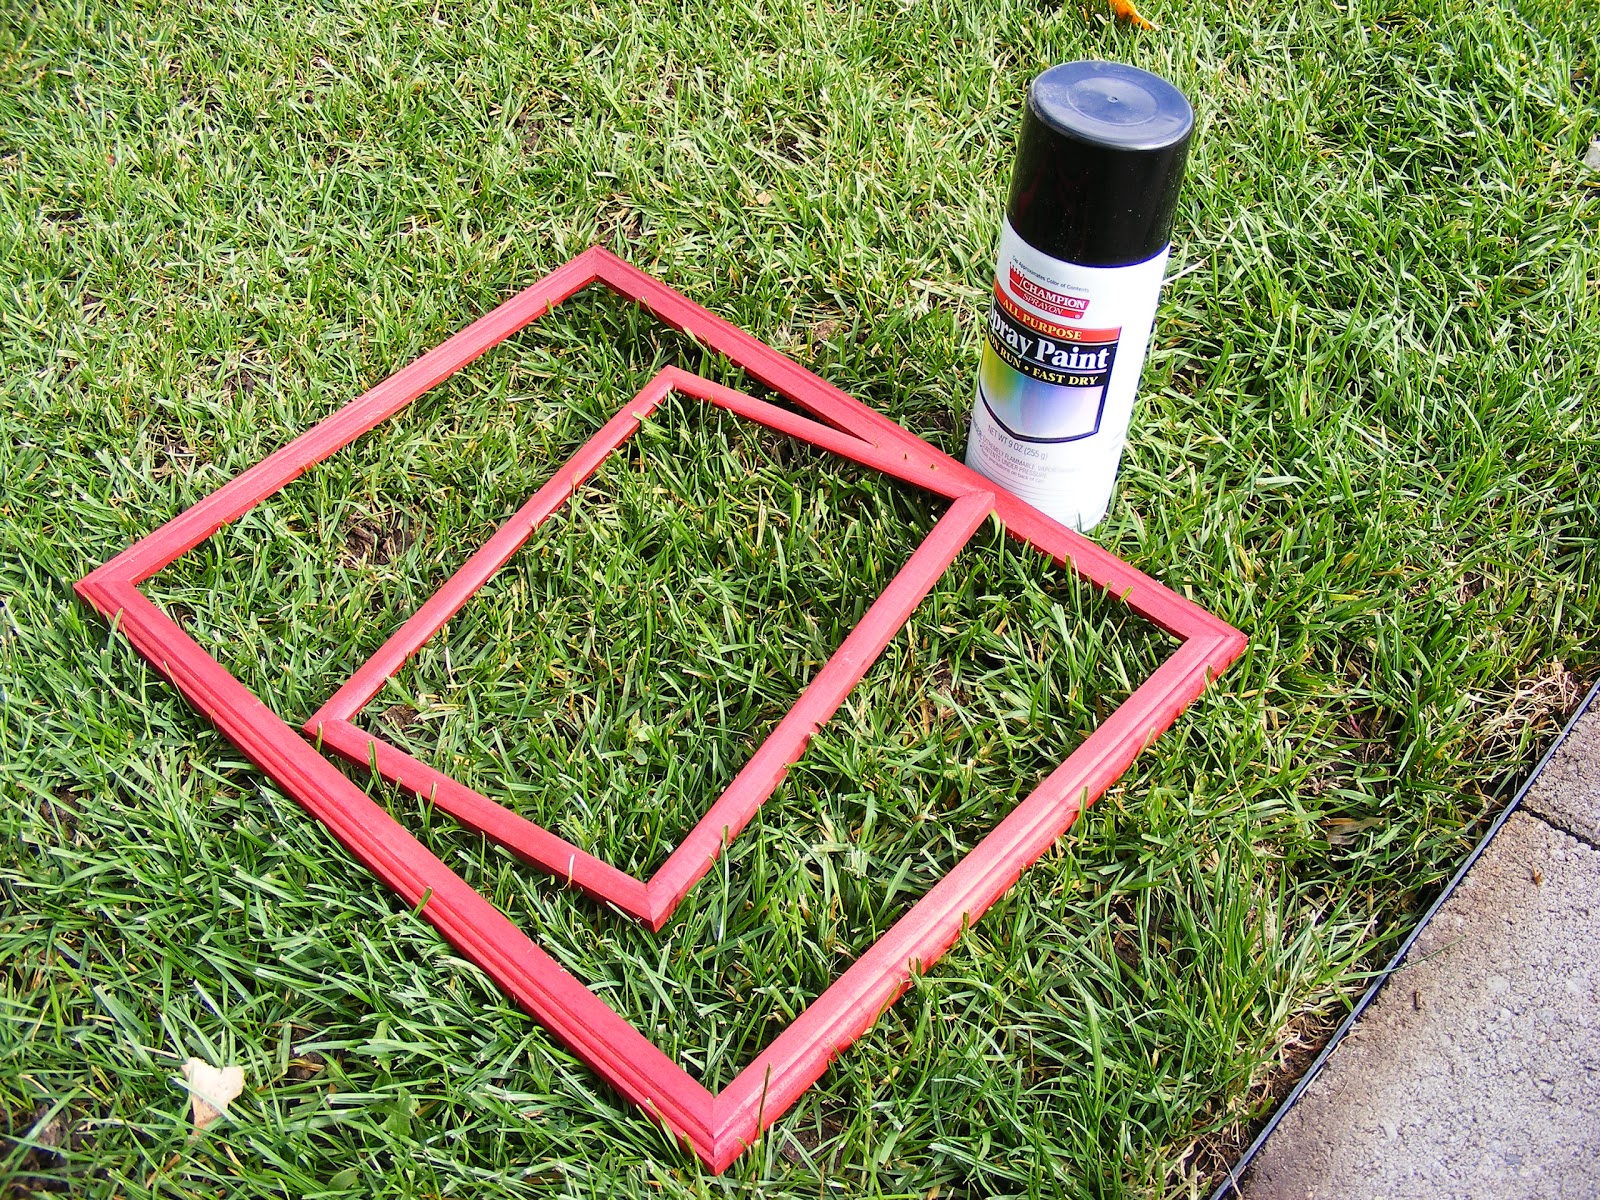
First step was to paint my frames. They were a red color that was alright but not my favorite. So I spray painted them black. I figured I would give them two coats of paint but when the first coat dried and had a bit of red showing through I ended up really liking that so I didn't do the 2nd coat of paint.


I then got busy on my computer and just using Microsoft Word I created the name and added our address! Very simple! I then just screwed in the i-bolts to the bottom of the big frame and top of the little frame and tied them together with some ribbon. I immediately hung it up by our front
door! I think it looks great! And you know every time I see that name I do feel a bit more pride in my home. :)


Saturday, December 12, 2009

Tu-Tu's

I looked around in the stores for different fairy costumes but didn't really find much I liked. The fairy costumes I found seemed a little skimpy especially for this cold weather and to be right honest $20-$30 for a Tinkerbell costume did NOT appeal to my finances! :) So I went home and started looking around on the internet for ideas and found some instructions on making my own Tu-tu's! I immediately fell in love with the idea, especially at how simple they were to make! I found a youtube video to provide me with instructions this is the one I used: http://www.youtube.com/watch?v=B7aSPMEn7S0

Here is a picture of one of the tu-tu's I made. I made two, one was green and white and then this one pictured- black & purple.

Name Frames

I made these cute little picture frames awhile back for my girls. I tried to personalize each one to there tastes or personality. My girls LOVED them! They were really easy to make. I just bought some frames at Walmart and cut out some cardstock for the background to fit in the frame. I used cardstock, rubber stamps, ribbon, brads and ink to create my frames.


Supplies: All supplies from Stampin' Up!

Sketches in Thyme {Bright}