Showing posts with label Cards. Show all posts

Wednesday, December 14, 2016

Holiday Cards & Tag

Hello! Do you make your own Christmas cards or tags? 
I had a few extra pieces from my Moxxie Party at the Pole.


Thanks for stopping by! Happy Scrapping! :)


Products Used:
Moxxie Party at the Pole

Wednesday, May 27, 2015

Moxxie {3- Happy Birthday Cards}


Good Morning! How was everyone's Memorial Day weekend? It was quiet and rainy around my place, but very welcomed. The kids are mostly done with activities and out of school for the summer.  I'm ready for life to slow down for just a little bit! ;)

Today I want to share with you some really fun Birthday cards I made using one of Moxxie's new lines- Magical Moments. 
This line is so bright and colorful! I love how the colors are perfect for summer but it's the perfect line for any Disney trip layouts or projects! Such a cute fun line. Want to see the cute Birthday cards I made using that adorable line? ;)
The really awesome part is when you open them! I used the same technique on all three for the inside but they all look different. We'll start with the first card on the left. The base of this card is black cardstock I then cut out a piece from the Magical Moments Cutouts and layered. Next I stamped the sentiment right onto the cutout.
Now for the inside.....  
I created a little "gift" with some balloons that I cut out freehand out of some of the scraps I had from this same line. Then tied on some bakers twine to the ends of them and stamped my sentiment along the top.

For the next card I started out with a red sheet of cardstock for the base. I then rounded up some scraps I had and cut the ends to created little banners. Then using a black journaling pen to create some faux stitching around the edge. 
Onto the inside. I love stars! I just fussy cut them from the sheet Wishes and adhered them all over.

Last but definitely not least..... For this one I used a yellow cardstock base layered with a piece from the sheet Dreams Come True. Next I added "Happy Birthday" using Moxxie's Black Alpha's. I then used the banner from the sticker sheet, added some Imaginisce jewels in between each one and a few by the sentiment.
If you thought one "gift" was cute, in the first card you'll really love this one! I love how adorable the gifts look stacked up. I wrapped some ribbon on each one and added bows, to really make them look like gifts
Now I told you at the beginning that I had used the same technique for the inside of all three cards. I found this awesome pin on Pinterest and had to give it a try. To see it Click HERE
I loved how fun and easy these cards were to make! 
Thanks for stopping by! :)


Moxxie Products I used:

MAG 1531- Daisies
MAG 1532- Wishes
MAG 1533- Dreams Come True
MAG 1534- Miss Mouse
MAG 1535- Magical Cutouts
MAG 2295- Magical Cardstock Stickers

AL 2278- Black Alpha

Saturday, April 4, 2015

Moxxie {Happy Easter Cards}

Good Morning! Today I've got two very cute and fun cards to share with you! I paired two unlikely new Moxxie lines together for these cards.... Grid Iron & Tiny Dancer.
Pairing these two lines together made the cutest Easter cards! Here's the first one...
I used my Silhouette Cameo to cut out the little bunny that I downloaded from Miss Kate Cuttables out of a sheet from Grid Iron, love the richness of that brown. Then I used a sheet from Tiny dancer to cut out the intricate egg. I tied a know in some ribbon and trimmed the ends and adhered it with a glue dot to the bunny. For the sentiment I used a stamp from a Stampin' Up! Stamp set- Just So Sayings and stamped it on a small piece of white cardstock that I cut the corners on to shape into a tag, punched a hole and threaded some linen thread through it then tied it onto the pink bow.

Want to see the next one? Ok, I won't tease you anymore. ;) Here's my 2nd card.
I used the scrap left behind from cutting out the bunny for the previous card to create this one. I layered it the pink cardstock that I used for my base and traced the bunny out and cut the shape out. I then adhered the brown layer on top of the pink, now my card front has a bunny shaped hole! ;) For the inside of the card I added a cute polka doted sheet from Tiny Dancer. Next, I added a little white pom-pom for the tail and tied a mini bow adhering it about where it's neck should be. Then I added 3 little enamel dots on the outside. Here's a look of the inside.
Just a little different but I love how cute and simple it turned out. 
Thanks for stopping by! :)


Moxxie Product I Used:
TD-1503 Born to Dance
TD-1504 Shine

GI-1469 Football

Tuesday, December 23, 2014

Moxxie {Neighbor Gifts}

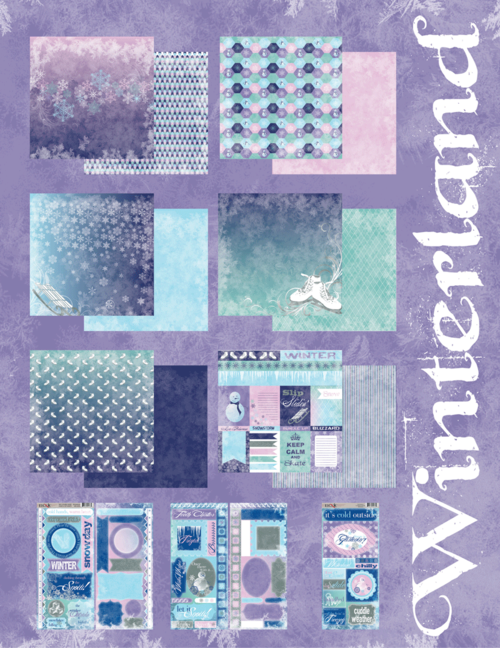
Good morning! I have some fun and very easy gifts you could put together. They make great neighbor gifts. :) They could easily be paired with a roll of wrapping paper & some tape. I used two of Moxxie's amazing lines- Winterland & Happy Pawlidays.
These are 6x6 sheet protectors that I decorated and turned into envelopes! The one on the left holds 3x3 cards and the other one holds some Christmas tags, even some for those furry friend gifts! :)
You start out with a 6x6 sheet protector and carefully cut off the side with the punched holes, make sure not cut the seam that keeps it closed! Then I cut out a 8 1/4" x 6 1/2" piece of cardstock, score it at 2" down from one of the long ends. Then you also need two pieces of designer paper- one to decorate the front side (so this can be any size) but for the insert that goes INSIDE of your sheet protector you need it to be 6" x 6 1/8". Next we will add some sticky tape to the back of your sheet protector and center and stick it the back side of your cardstock below the score line. Next you'll cut off the two corners at the top to make it look like an envelope flap and add a Velcro dot towards the center (I like to keep the dots together, stick it to one side then press down to stick it to the other side) It should look like this...
Now because you can see those sticky strips and they just aren't attractive! We insert the piece of designer paper you cut earlier, the 6" x 6 1/8" one.
Now make what ever you want to put inside of them!
I made some 3x3 cards for one and some cute little tags for the other.
Well I hope I've helped you out with a last minute gift idea!
Thanks for stopping by! :)


Moxxie Product Used:

WN-1480 Frozen
WN-1481 Snow Buddy
WN-1482 Slip Slidin'
WN-1483 Ice Princess
WN-1484 On the Edge
WN-1485 Winterland Cutouts
WN-4024 Winterland Diecuts
WN-2234 Winterland Element Sticker

HA-1458 Santa's Little Helper
HA-1459 Define Naughty
HA-1460 Merry Christmas
HA-1461 Pawliday Cutouts
HA-2272 Pawliday Cardstock Sticker

Other Products Used:
Twine
Wood Veneer
Stickles
Silver Cord
Silver Ribbon
3D-Dots
Stampin' Up! All Year Cheer 1 stamp set
Tim Holtz Vintage Photo Distress Ink

Friday, November 7, 2014

Moxxie {Autumn Glory Cards & Blog Hop}

Good morning! Fall is in full swing here. The leaves have all changed their colors and are falling off. I love walking through them and hearing them crunch under my feat. It's just gorgeous around here. I love this time of year. I have some fall cards and a fun blog hop with a great giveaway to share with you today! I want to start by showing you my cards! :)
I really love how Moxxie's line of Autumn Glory really captures fall. On my Thank You card I used a Martha Stewart punch, some Bazzil Basics Paper Leaves, ribbon and a SU! stamp for the sentiment.
On this one I did a bit of fussy cutting that I "popped" up with some 3D-dots to add a little dimension. I also did some distressing and tied it off with some linen thread.
For the third card I used an embossing folder and sanded it down along with some distressing along the edges. I fussy cut around some flowers from the sheet Bountiful Bouquet and inked up the edges. Then layered them up with 3D-dots to give it some dimension.
I really love how all three cards turned out.

And of course for the blog hop info and like I said, there is a PRIZE involved!
None other than the amazing New Winterland!!!
This line has a fantastic color combo, fun patterns and cute embellishments for all of your wintertime activities!


Details on how to WIN this line are below.


 To be eligible to WIN all you have to do is comment on the Moxxie blog (US addresses only please). 
Extra chances to win include:
  1- Comment- on any (or all) of the designers blogs
  2- Facebook- share the blog hop post (let us know by leaving a link on the Moxxie blog)
  3- Pinterest- pin any (or all) of these wonderful projects (leave a link for each pin on the Moxxie blog)
  4- Challenge- Enter your card in our challenge! 3 extra entries if you use MOXXIE product! 
Link directly to your project or project post. (link up using the inlinkz tool at the bottom of this page)
Commenting and Challenge end Nov 30th.

Good luck & Thanks for stopping by! :)


Moxxie Products Used:

AG-1454 Fanciful Flowers
AG-1455 Season's Beauty
AG-1457 Bountiful Bouquet
AG-2271 Autumn Cardstock Sticker

Tuesday, September 23, 2014

Moxxie {16 Fall cards with a One Sheet Wonder}

Hello! How is everyone doing? Today I have fun project to share with you using Moxxie's new line 
Autumn Glory I just love the deep, rich colors of this line.
I don't know about you guys but I'm always in need of a few "Thank You" cards. The easiest and fastest way to pump a few out is by using a One Sheet Wonder (a.k.a OSW) template. Have you ever heard of these? It's where you take a sheet of designer paper and you cut it up according to the template you have and allows you to create a bunch of different cards in a short period of time. It's a great way for me to use some of my cardstock scraps also. :) I've used this particular template a few times and I've been able to produce 14-16 cards, today I produced 16 cards.
Here's my 16 cards!
I used some Kraft cardstock as my base for all the cards and then found some different "Thank You" & "Thinking of You" sentiments in my stamps. Then found some cardstock scraps that matched along with the colors of my designer paper so that I could embellish and accent a bit more with it. I also used various embellishments such as linen thread, brads & twill tape along with inking along the edges using Tim Holtz Distress Ink Photo Vintage. Here's a close up the cards. 

Thanks for stopping by! :)


Moxxie Product Used:
AG-1456 Foliage in Flight

Tuesday, September 9, 2014

Moxxie {Start Your Engines & Totally Rad Cards}

Good morning! Today I want to share with you a couple of fun cards I made using Moxxie's new line Racing. Having 3 daughters I don't usually get to play with or make boy cards. So I decided to try my hand at a couple. The first one is a Birthday card.
I started out with sheet of 8.5"x11" black cardstock and then just folded it in half (it's a big card lol). I fussy cut the car out of the sheet Speed. The words & banner came from Racing Cardstock Sticker. Then did a bit of pen lines around them to add a finished touch. Then the inside of the card I used White Alphas, a strip from Racing Cutouts, a few stickers from Racing Cardstock Stickers. I fussy cut the car from one of the stickers, here's a close up.

Then for the second card, I used the motocross part of Racing. I made a 4.25"x5.5" card from some Kraft cardstock. I sprayed it and dripped some Heidi Swapp Chartreuse Color Shine and inked the edges with some Time Holtz Vintage Photo Distressing Ink. I used the Motocross sheet to back the Motocrosser from the Racing Cutouts. I did a bit of distressing around it. Wrapped some twine and added a few brads to help balance it out.
Then for the inside I used Moxxie's new Brown Alpha's and added a sticker from the Racing Cardstock Stickers.
Thanks for stopping by! :)


Moxxie Product Used:
RC-1477 Speed
RC-1478 Motocross
RC-1479 Racing Cutouts
RC-2276 Racing Cardstock Sticker
AL-2279 White Alpha
AL-2281 Brown Alpha

Thursday, January 9, 2014

Guest Designer Projects

Well my time as a Guest Designer at 3 Scrappy Boys has come to an end. I had so much fun and really enjoyed using their kit! Here are all my projects together that I created using their TRIO KIT. Enjoy!


 And ONE made it into Scrap n' Art for publication! I'll be able to publicly share that one with in March till then you'll just have to wait ;)


Tuesday, February 5, 2008

Making Changes...

Well hello! I know I've been horrible at updating....why does life feel like it can get in the way all the time!!?? The very nerve! LOL Anyway, I've decided to make a few changes to my blog. First of all I've changed the look a little. Second it will still primarily be a place for me to post my crafts and stamping but I will begin including a little more about my family and third of all I REALLY hope to be able to post more regularly.

Well since it has been so long since I have posted anything I will share a quick card that I made last fall. I really fell in love with the new In Color Purely Pomegranate from Stampin' Up!


I hope everyone's new year has so far been good!

Tuesday, June 26, 2007

Wild about You!!


Well I'm still at it....playing Bingo with Julee!!!! I haven't had too much time to actually stamp much these past few days but Julee posted another sketch for the Bingo game that I just had to try it! I'm not sure how well I like this card. I really love this set. I'll post more info on this card tomorrow along with a recipe. It is way past my bedtime. :)

All Supplies from Stampin' Up!:
Stamps: Wild About You
Paper: Only Orange, Confetti White, Taken with Teal & Old Olive Card stock & Simply Scrappin' Party Pieces Designer Paper

Ink: Only Orange, Old Olive & Basic Black Classic Inks

Other: Silver Eyelets; Slider, Corner Rounder 1 1/4" circle & Key Tag Punch; Coluzzle, Metal Edge Tags, Crafters Tool Kit

Sketches in Thyme {Bright}